
How to make a sourdough starter in little as eight days. The most effective way to make an active starter as quickly as possible with day-by-day photos and instructions.
Have you been bit by the sourdough craze? Maybe you tried to make a starter and it just didnt work out. Maybe your nervous to give it a shot.
That’s why I'm here!
I started my sourdough journey in July of 2019 (pre pandemic baker!) and haven't stopped since. I have helped so man people get a starter of their own going as well as conquer that first loaf.
And I can help you.
It took me multiple attempts to get my starter active as well as make my first loaf so I’m here to say, it’s not always easy. But it is well worth it.
I started in July, but didn't make my first successful loaf of bread until Christmas. So it took me almost 5 months to make that first loaf of bread.
I have complied all my wins, and failures, and have a technique that I hope helps cut out all that time (and flour) I wasted.
I have made multiple starters and using the method here I had one going in just 8 days. My first one took almost 4 months.
Let’s take a look first at what a starter even is before we dive in to making one.
Jump to:
- What is a Sourdough Starter?
- What Can You Do With a Sourdough Starter?
- Equipment and Ingredients
- Tips, Tricks and Important Info
- How to Feed a Sourdough Starter
- How to Make a Sourdough Starter
- Is it Growing?
- My Sourdough Starter Still Isn't Rising
- What to Do Once It's Active
- Sourdough Starter Frequently Asked Questions
- 📋Recipe
What is a Sourdough Starter?
The quick definition, it is a leaven for baked goods.
What is a leaven? A leaven is what gives rise to baked goods. It can be instant yeast, baking soda, baking powder and a sourdough starter. It what takes dough or batter to a fluffy and soft treat.
But what is it really?
Sourdough Starters are a mix of flour and water that has fermented over time, and host a live culture, that can be used to give rise to breads and other baked goods.
It collects the wild yeast and microbiomes in our environments, trapping it inside the flour, and bringing it to life.
Basically we are creating a live environment inside the flour mix.
This ecosystem is what gives beautiful rise to bread and other baked goods. It has been done for centuries and still works today.
If you are interested in more of the actual science behind what is happening Serious Eats has a great article breaking it all down.
A sourdough starter has even been found to be easier to digest with some people. The reaction that takes place breaks thing down that our bodies have a hard time to digest. It also doesn't require any sugar to make it active.
So many commercial bread products have loads of sugar and other additives that sourdough just doesn't need. Making it better for our bodies.
Because we feed and care for a starter that means it can live a long time. How long can a starter live? There are claims that some sourdough starters have been passed down for generations, and are over 100 years old!
As long as they are cared for properly, they can last a lifetime.
What Can You Do With a Sourdough Starter?
There are endless possibilities for that starter.
First off is that classic loaf of sourdough bread.
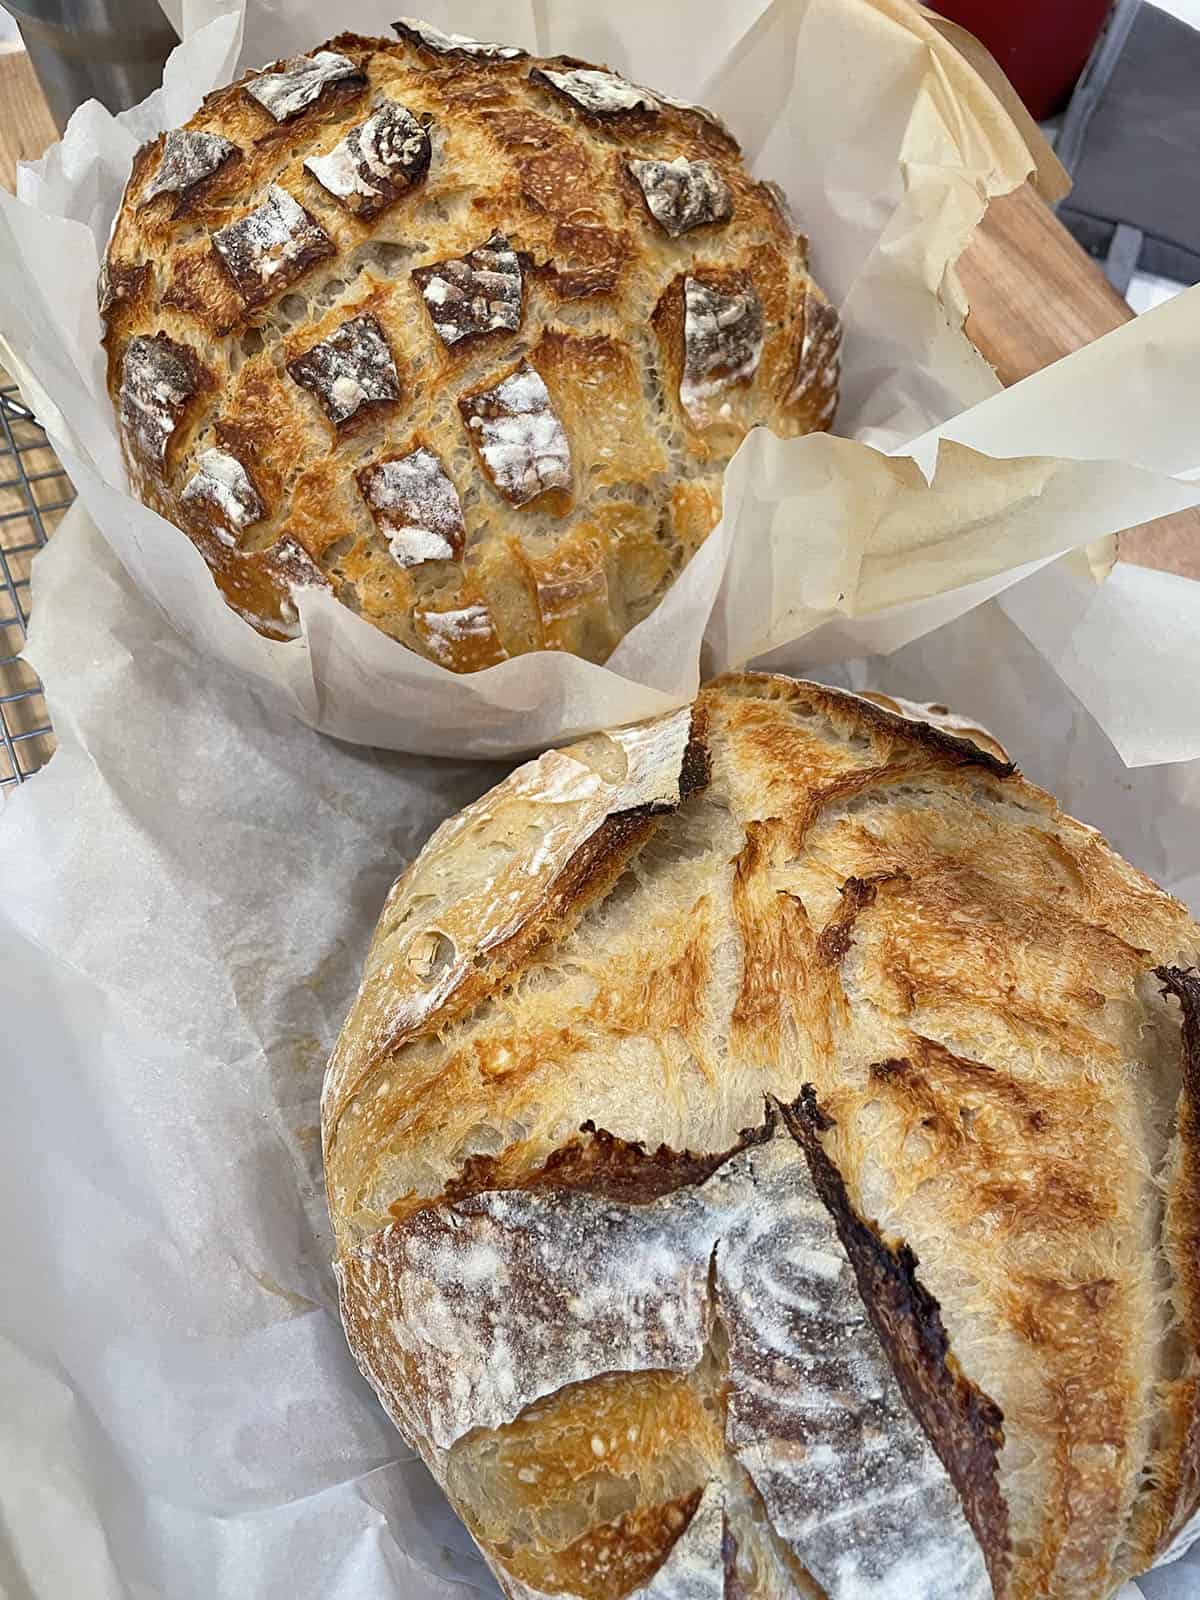
Sourdough bread calls for very simple ingredients and only uses flour, water, salt and the starter. It requires zero yeast, no sugar or dairy, and a longer proofing time.
All resulting in the best and freshest tasting bread.
In addition to bread, there is along list of things you can use that starter in.
Thing you can make with a starter include: Sourdough discard pancakes, pizza, quick breads, sourdough crackers, sourdough discard chocolate chip muffins, cookies and just about anything else that needs a leaven.
Some recipes take time to rise and others require no time. Get all my recipes that use a sourdough starter.
Equipment and Ingredients
Equipment
Digital Scale. The best way to measure out the ingredients. Cup measurements are not as accurate. 1 cup of flour can vary between 110-140 grams of flour. That is a huge difference.
2 glass bowls, containers or jars. I like to have two bowls so the starter can be transferred to a clean one. While some prefer to use a jar, I just find a bowl so much easier to use.
Danish Dough whisk. Not necessary but definitely makes it easier. A wooden spoon can also be used.
Flour sack towel or tea towel: you want a towel to cover the bowl. It needs to be light enough to let in the thing we want, but heavy enough to keep out the things we don't.
Get my entire list of recommended sourdough tools and equipment.
Ingredients
Ther eare only two ingredients needed to make a starter.
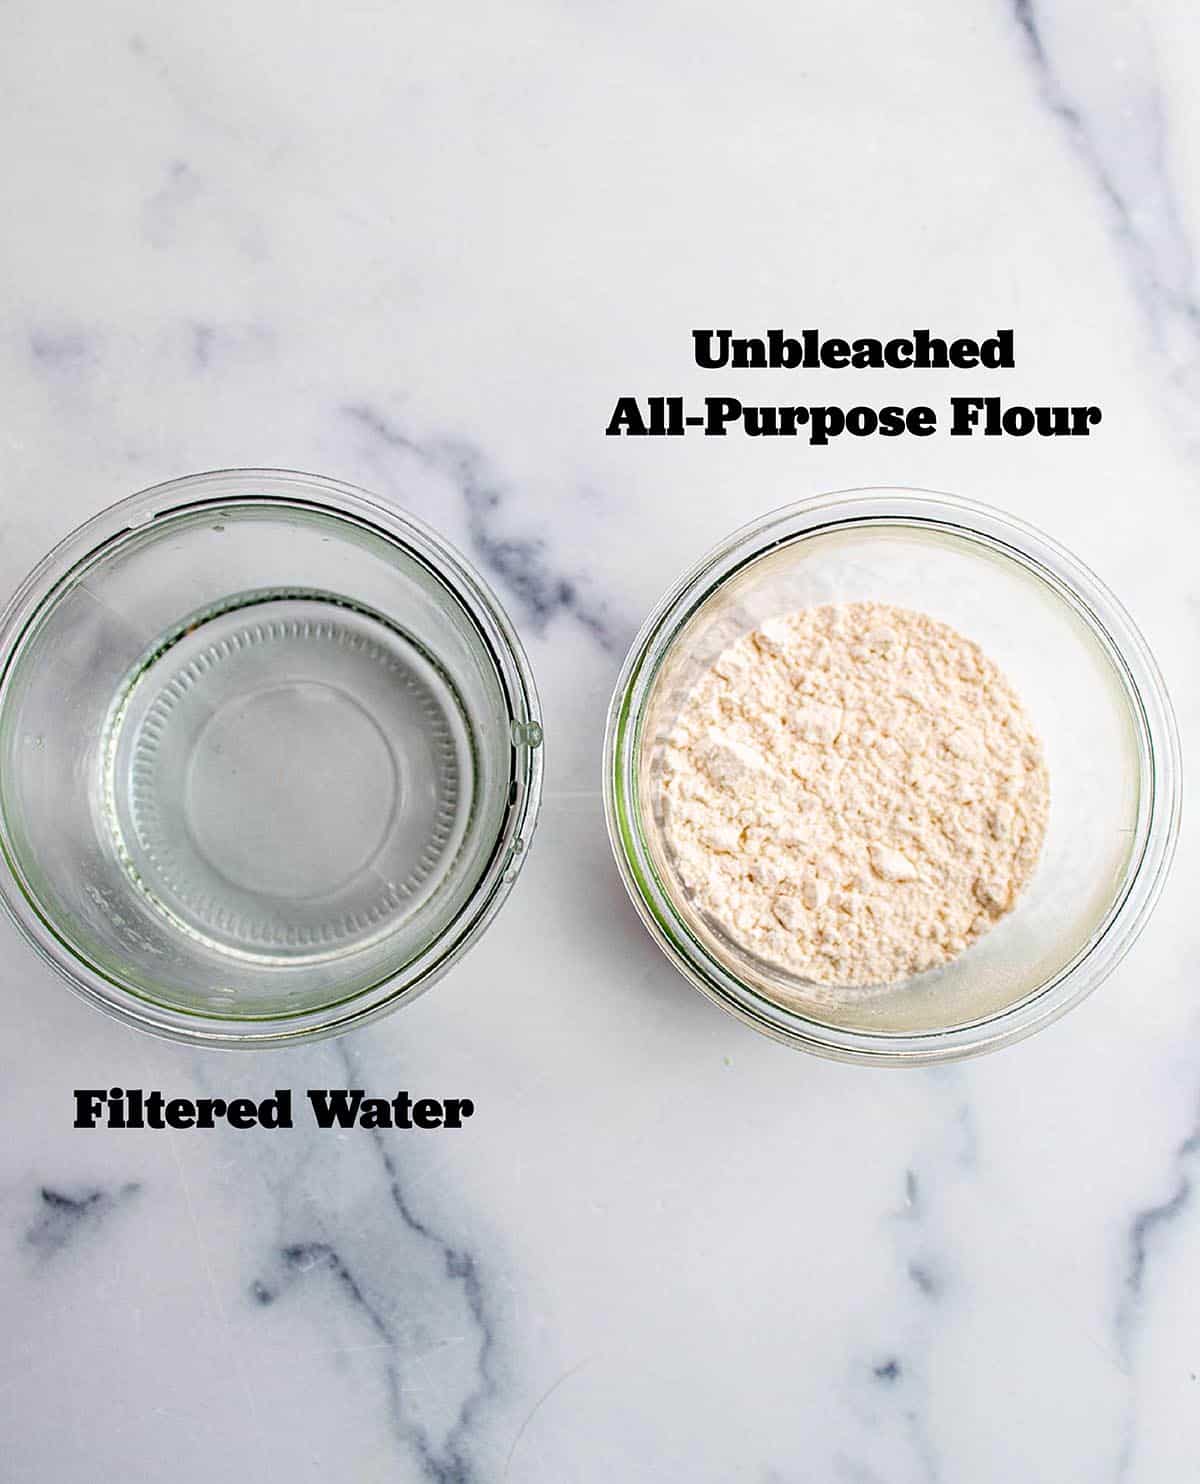
Flour and filtered Water
The type of flour is up to you. The preferred is going to be unbleached all-purpose flour but bread flour can also be used. I did not see success with bread flour but some do.
All-purpose just works the best for my environment. If you are using all-purpose, make sure it is unbleached.
Whole wheat flour: To get a starter going I do recommend using whole wheat flour for the first day only then after that switching to all-purpose or bread. This is not necessary but I did find when starting with whole wheat it just took off faster.
Thats it!
Very little equipment and ingredients are needed to keep a healthy starter.
Tips, Tricks and Important Info
Making a sourdough starter is a very simple idea and process. While it requires a little bit of time, it is not difficult at all.
I have made a few starters, some were major fails and the other was a quick success. The process that I share was the fastest method.
Here are a few things to keep in mind.
- Measure the ingredients in grams. Cup measurements are not accurate and one cup of water is not the same as one cup of flour.
- Keep a 1:1:1 ratio. This means you want the same amount of water, flour and starter by weight in grams.
- Keep the bowl clean. I like to use two bowls or jars to keep my starter in a clean jar to help prevent the growth of mold and bacteria.
- Keep it in a warm dry place. Sourdough starters thrive in warmer environments. Keep it in a location that is 70-75 degrees.
- Store it away from where you prep food. We only want flour, water and the natural environment to affect our starter. If it is around your cooking area, other ingredients might make its way in.
- Do not put starter in the sink/drain! Make sure when you discard you are throwing it in the trash. When a starter is exposed to air it can become really hard and stick to things. This can cause a blockage in your drain.
- Do not cover with a tight lid. This can cause the gasses to build up and can end up shattering the jar.
- Keep the container covered with a light tea towl. I also like to use a flour sack towel. If the towl is too heavy it wont allow the things in that we need.
How to Feed a Sourdough Starter
To get a good active starter it is importan to keep it on a good feeding schedule, especially in the beginning.
How do you feed a starter? When first starting out, it is so important to remove half (and toss) before feeding with fresh flour and water. This will give that growing culture new food to feed on. Only making it stronger.
For example: Remove half, weigh what is remaining and then feed it. So if you have 100 grams of starter you will want to feed it 100 grams of flour and 100 grams of water.
Some sourdough bakers will feed by how it feels. This has never worked for me and has left me with an underperforming starter. I swear by the 1:1:1 ratio but do what feels right for you.
Why do we discard sourdough starter? Half will need to be tossed each time because if we didnt it would grow out of control. Because we are keeping such a small amount there isn't that much that needs to be tossed each time.
After about a week that discard can come in use and can be added to things like pancakes or sourdough waffles. Get all my discard recipes to start using your starter in.
Just the frist week we will want to throw it away.
How to Make a Sourdough Starter
Let’s get started! Pun intended.
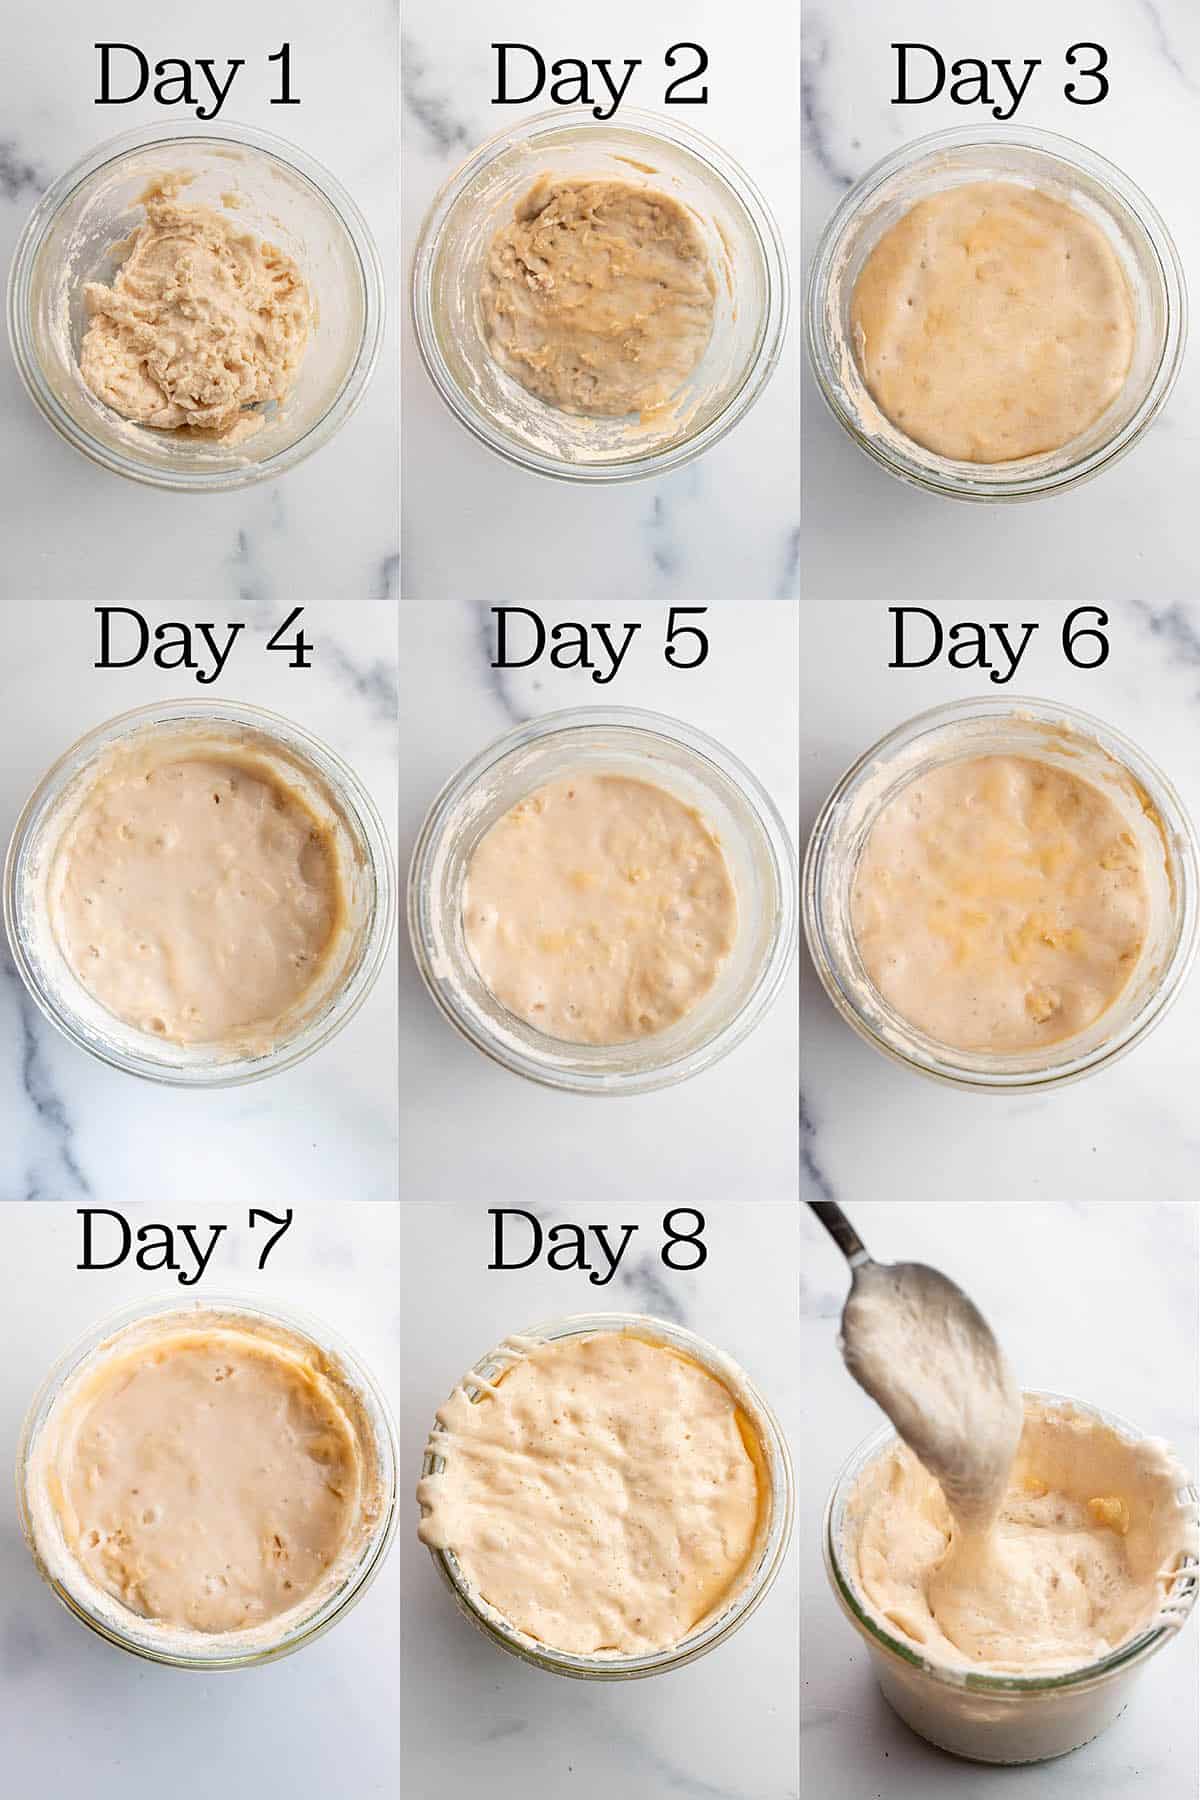
Day 1:
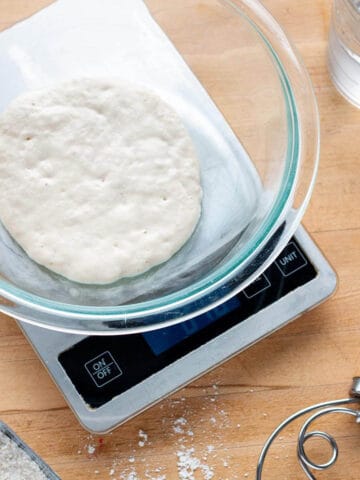
Take a clan bowl, or jar and place on a digital scale. Set it to gram measurements and make sure it is zeroed out.
Add in 50 grams of whole wheat flour and 50 grams of filtered water.
The whole wheat is just a suggestion. You can also just start with unbleached all purpose. I have made starters both ways and they both turn out great.
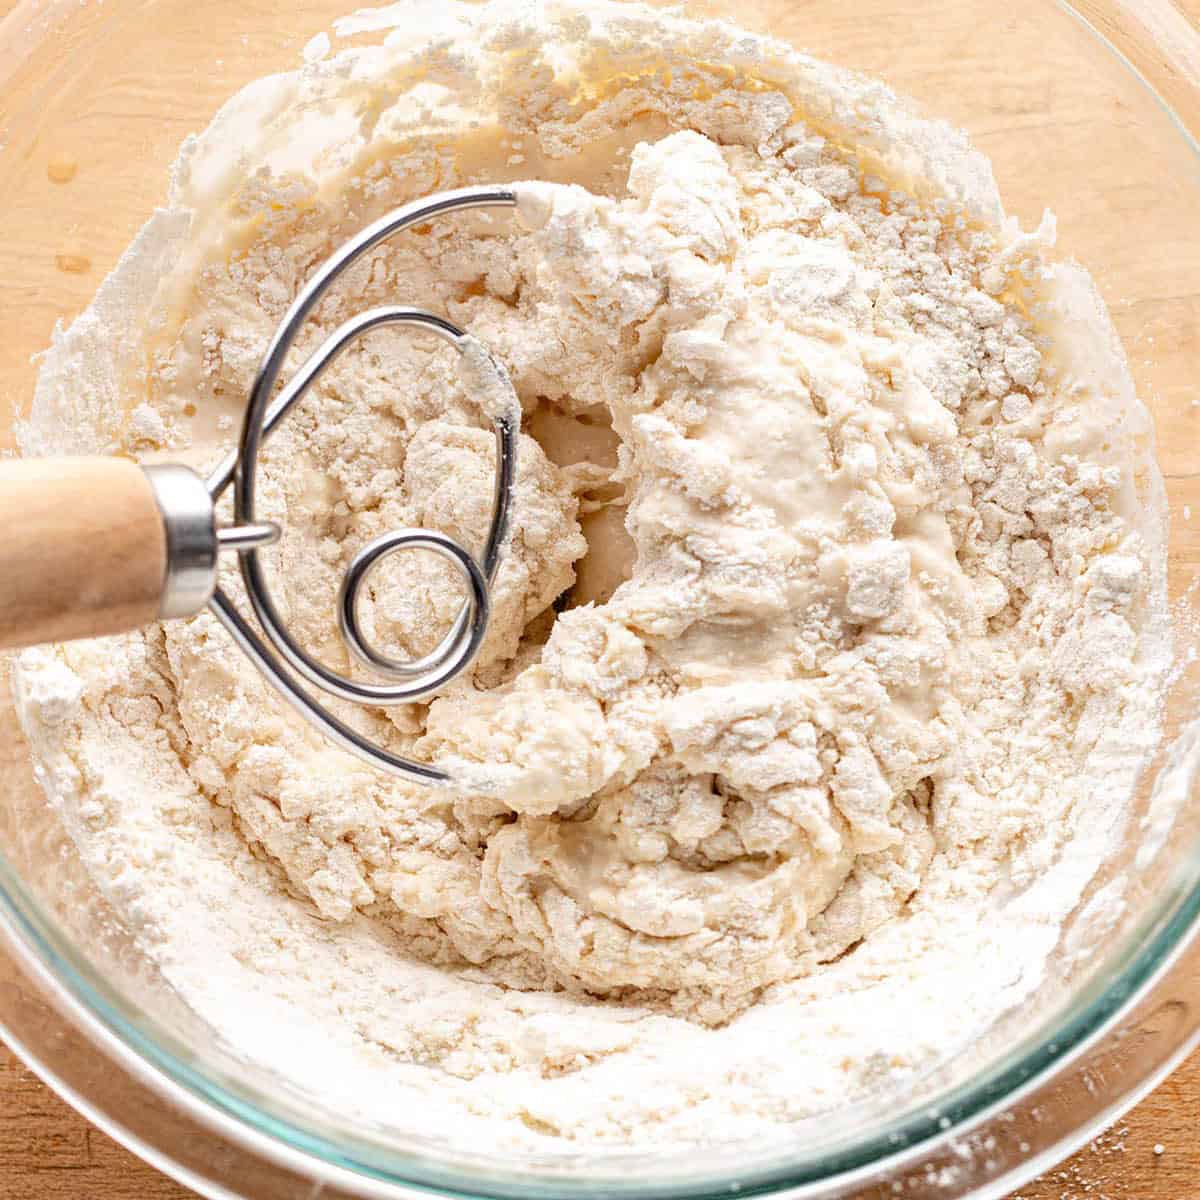
Mix it well, cover, and let it sit for 24 hours. Thats it!
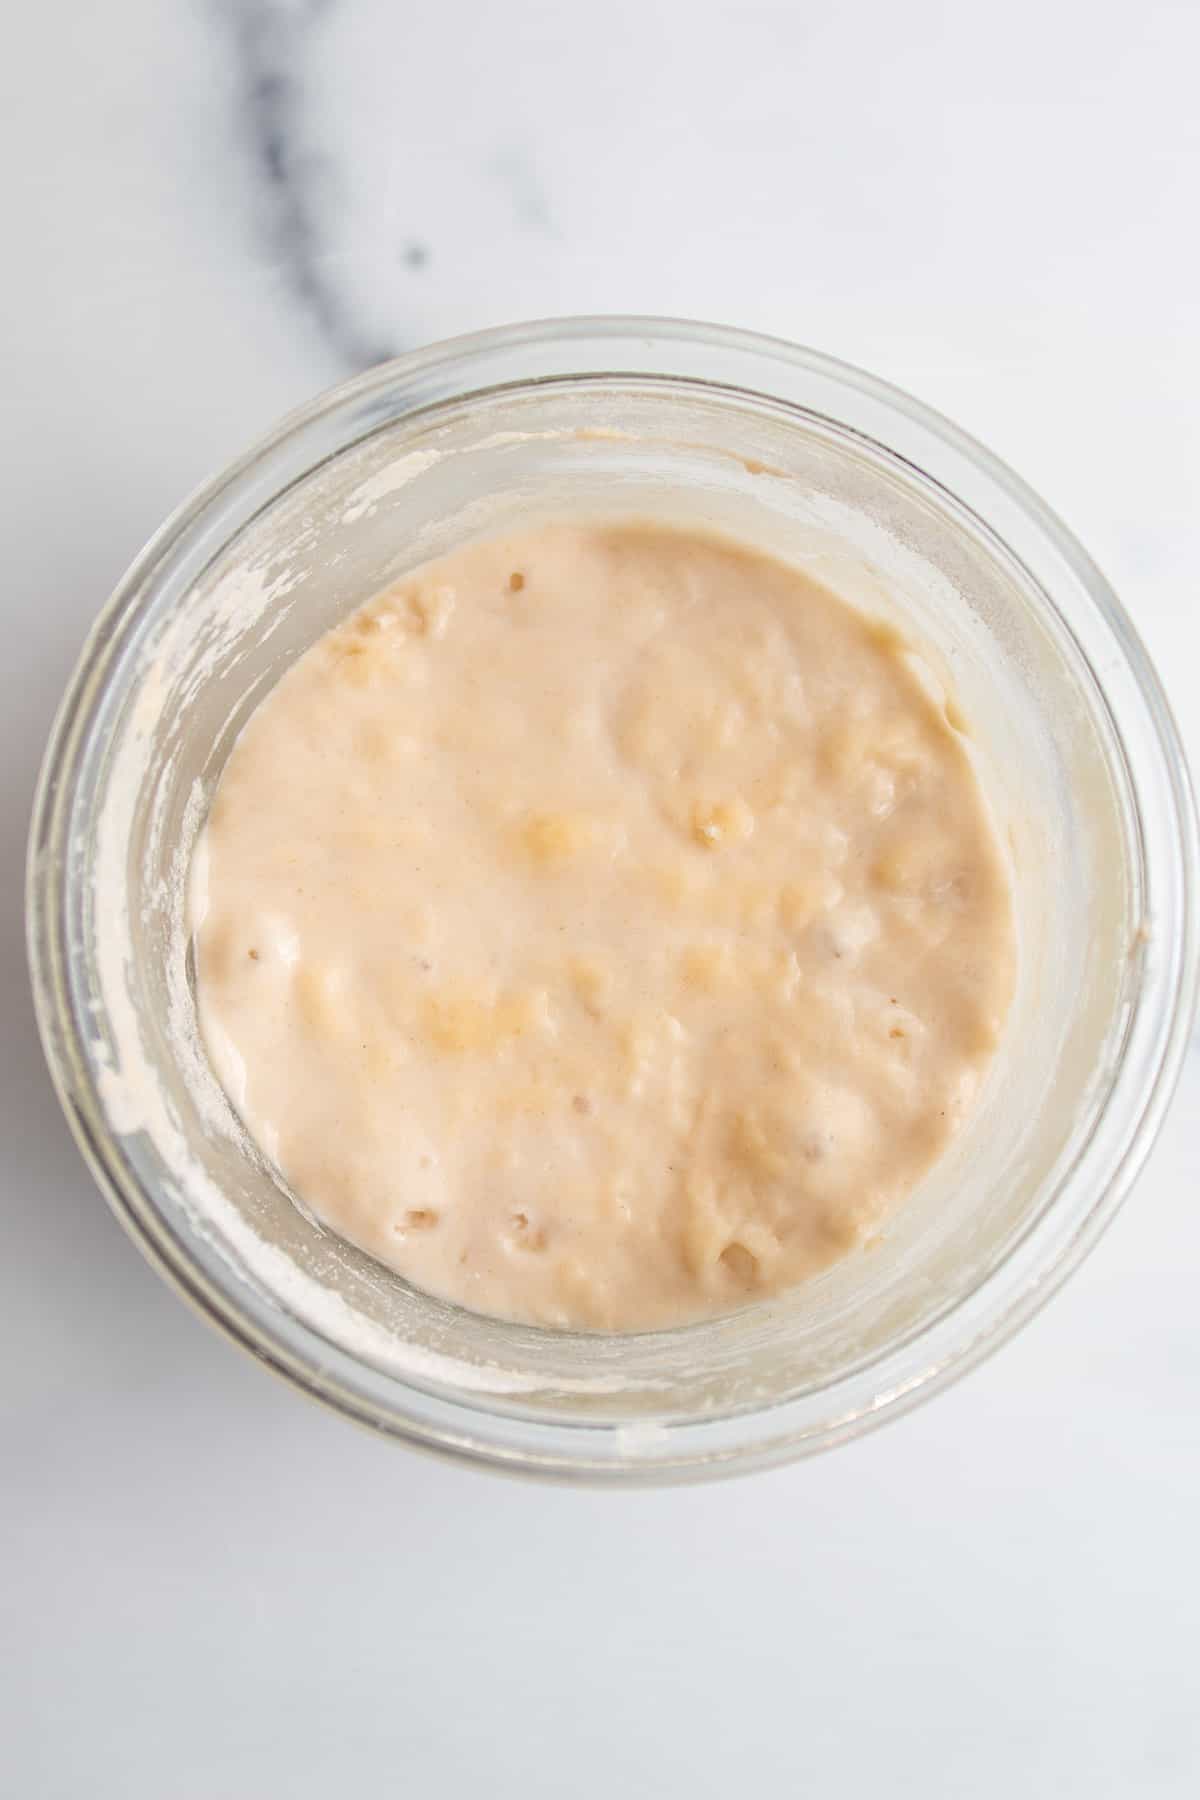
Day 2:
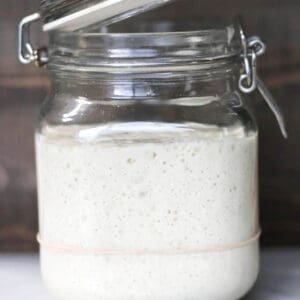
After 24 hours of resting this is what it should start to look like. It should be really thick and might even start to develop a crust on top.
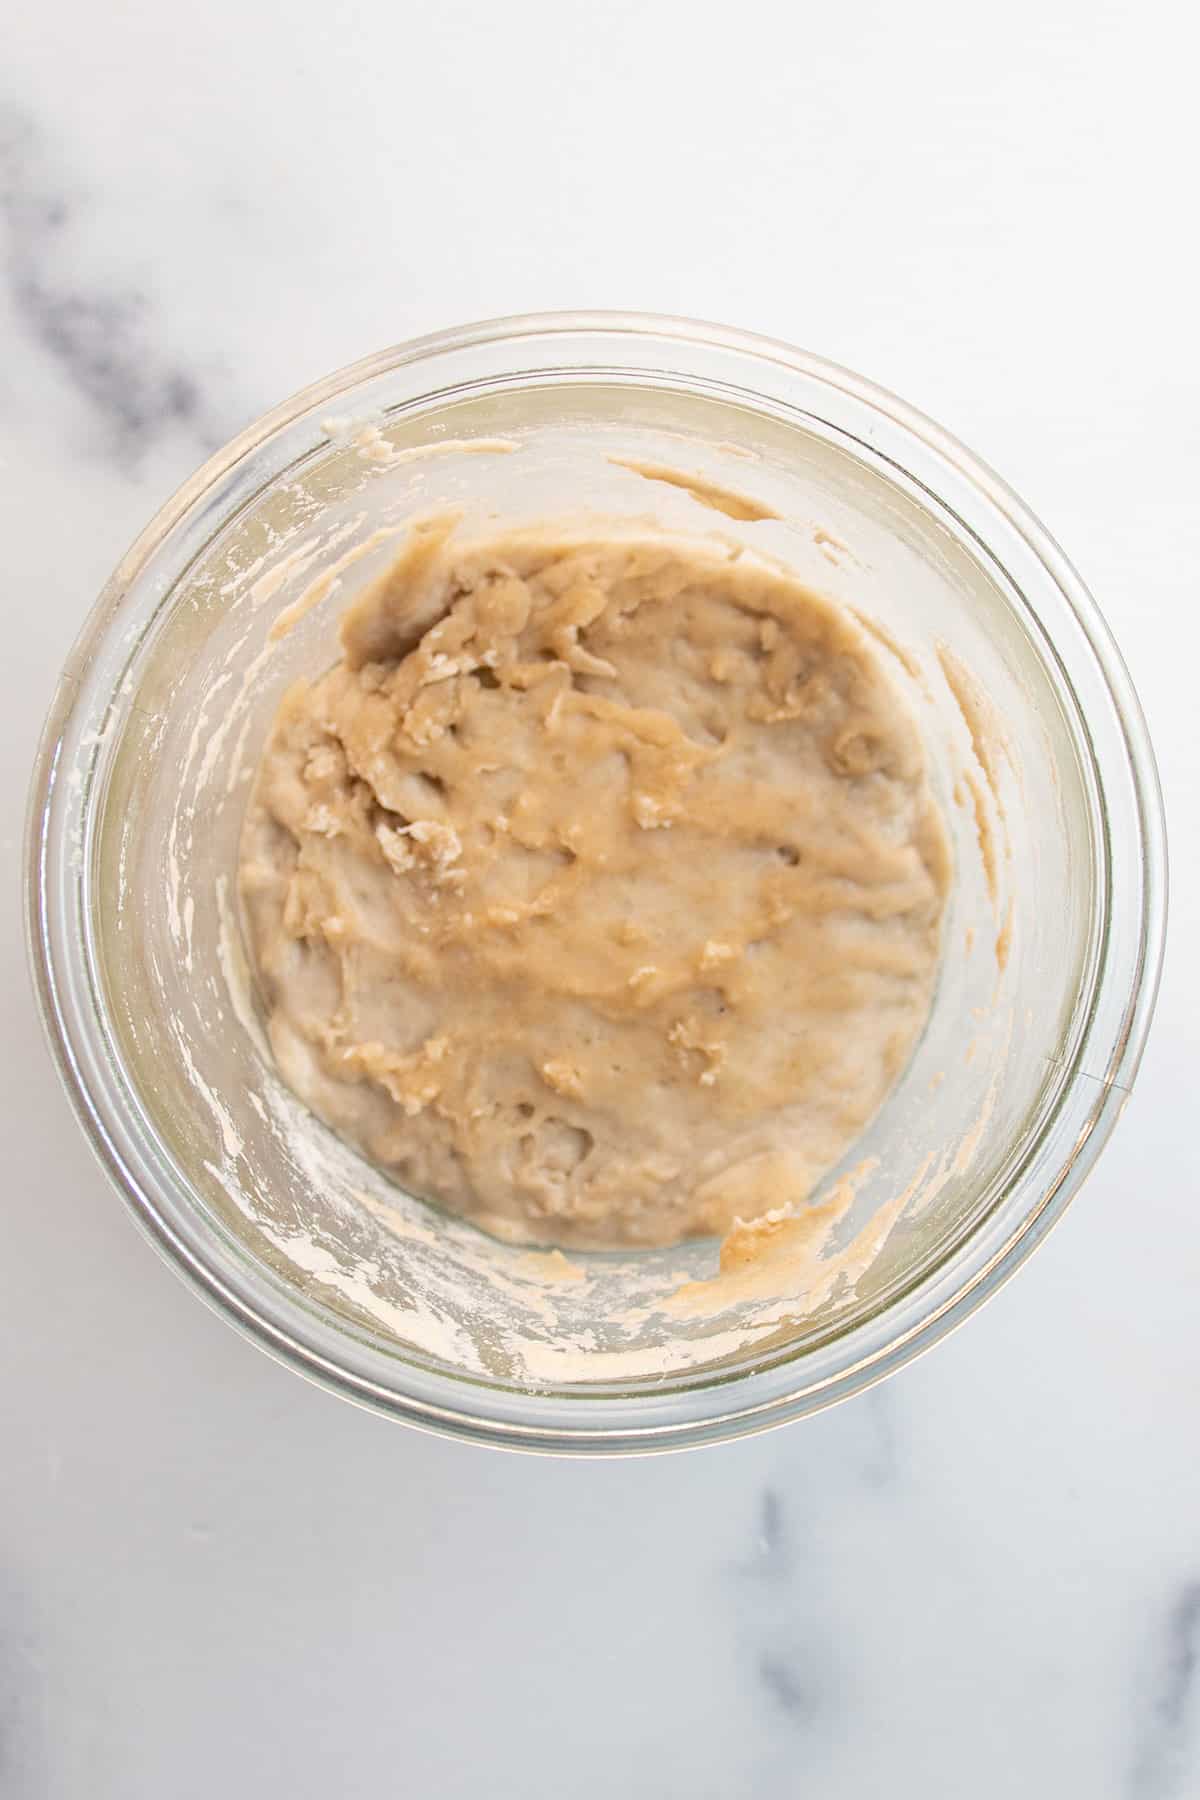
It now needs to be fed. Remove half of the starter, leaving about 50 grams.
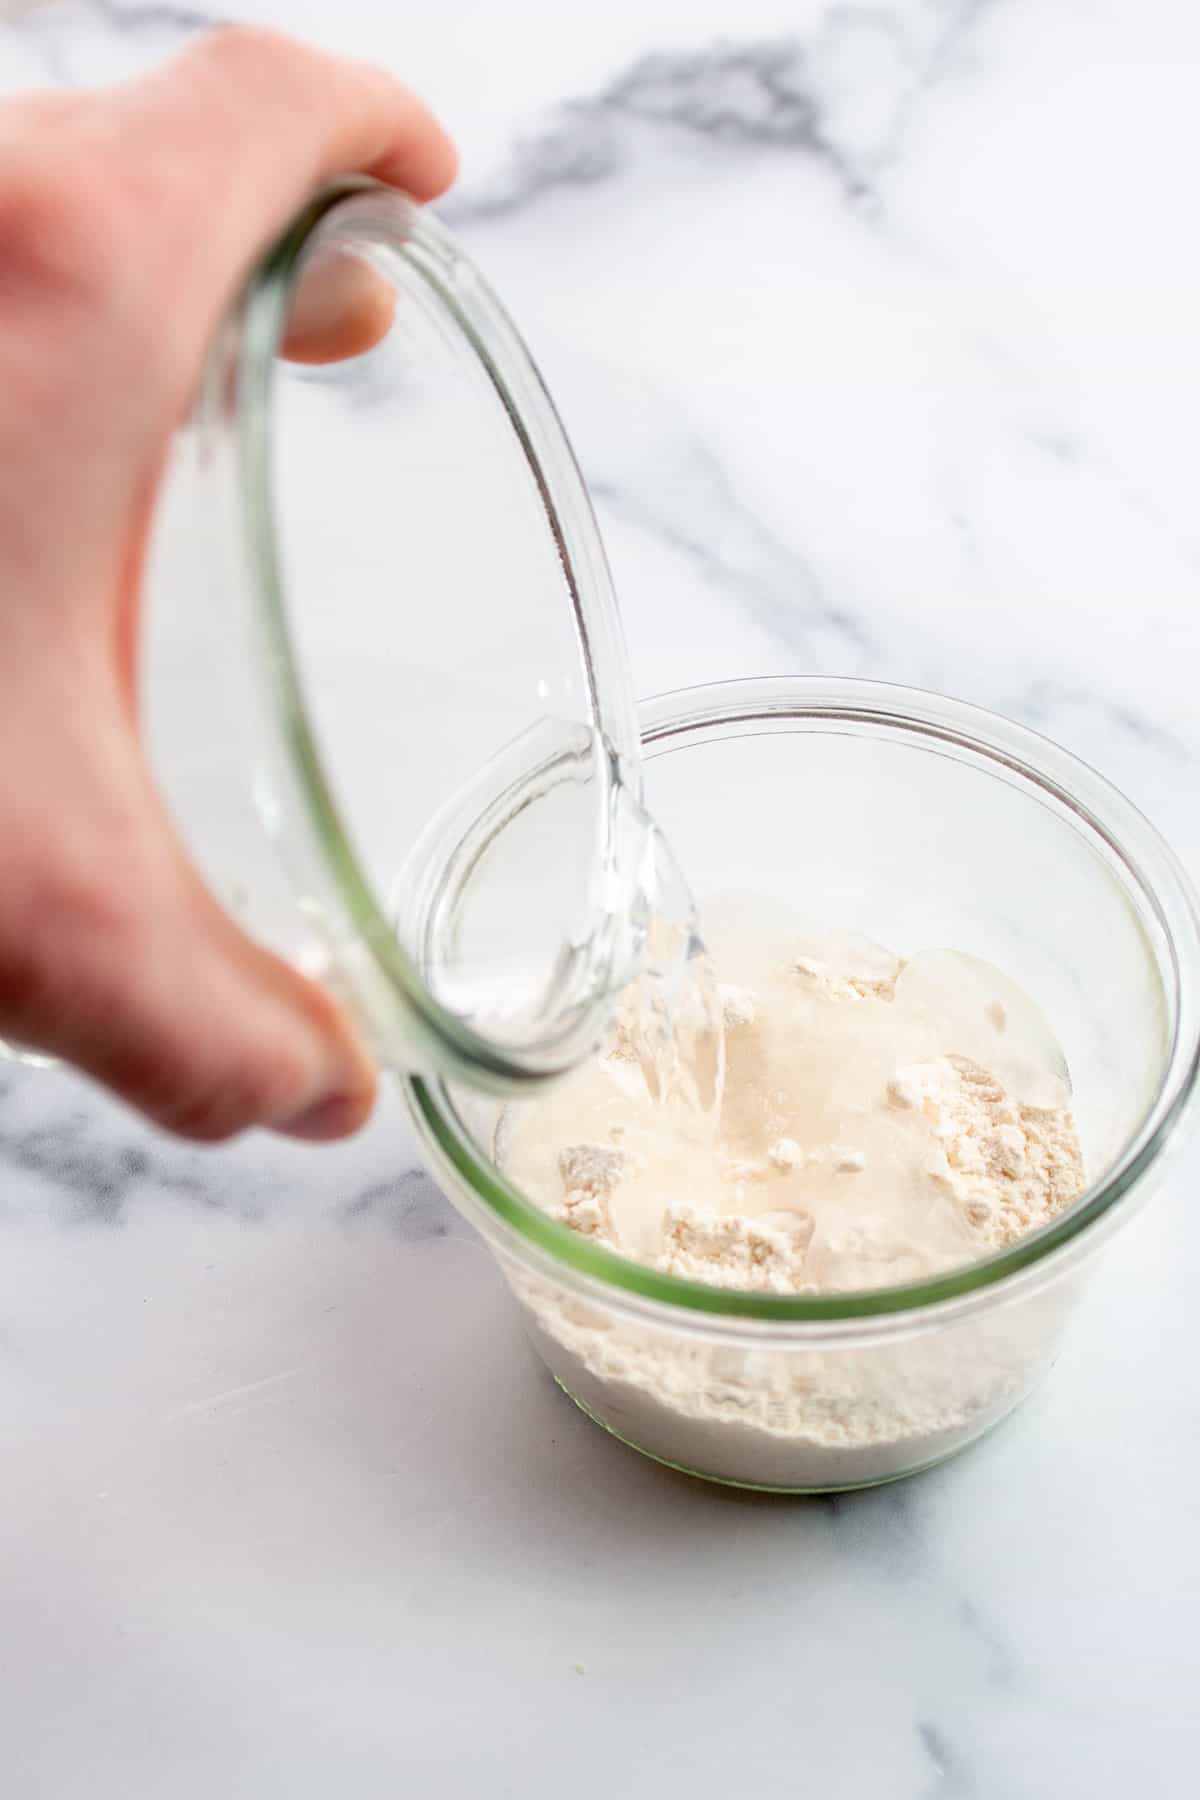
Add in 50 grams of flour.
Pour in 50 grams of filter water.
Mix, cover and set aside agin for another 24 hours.
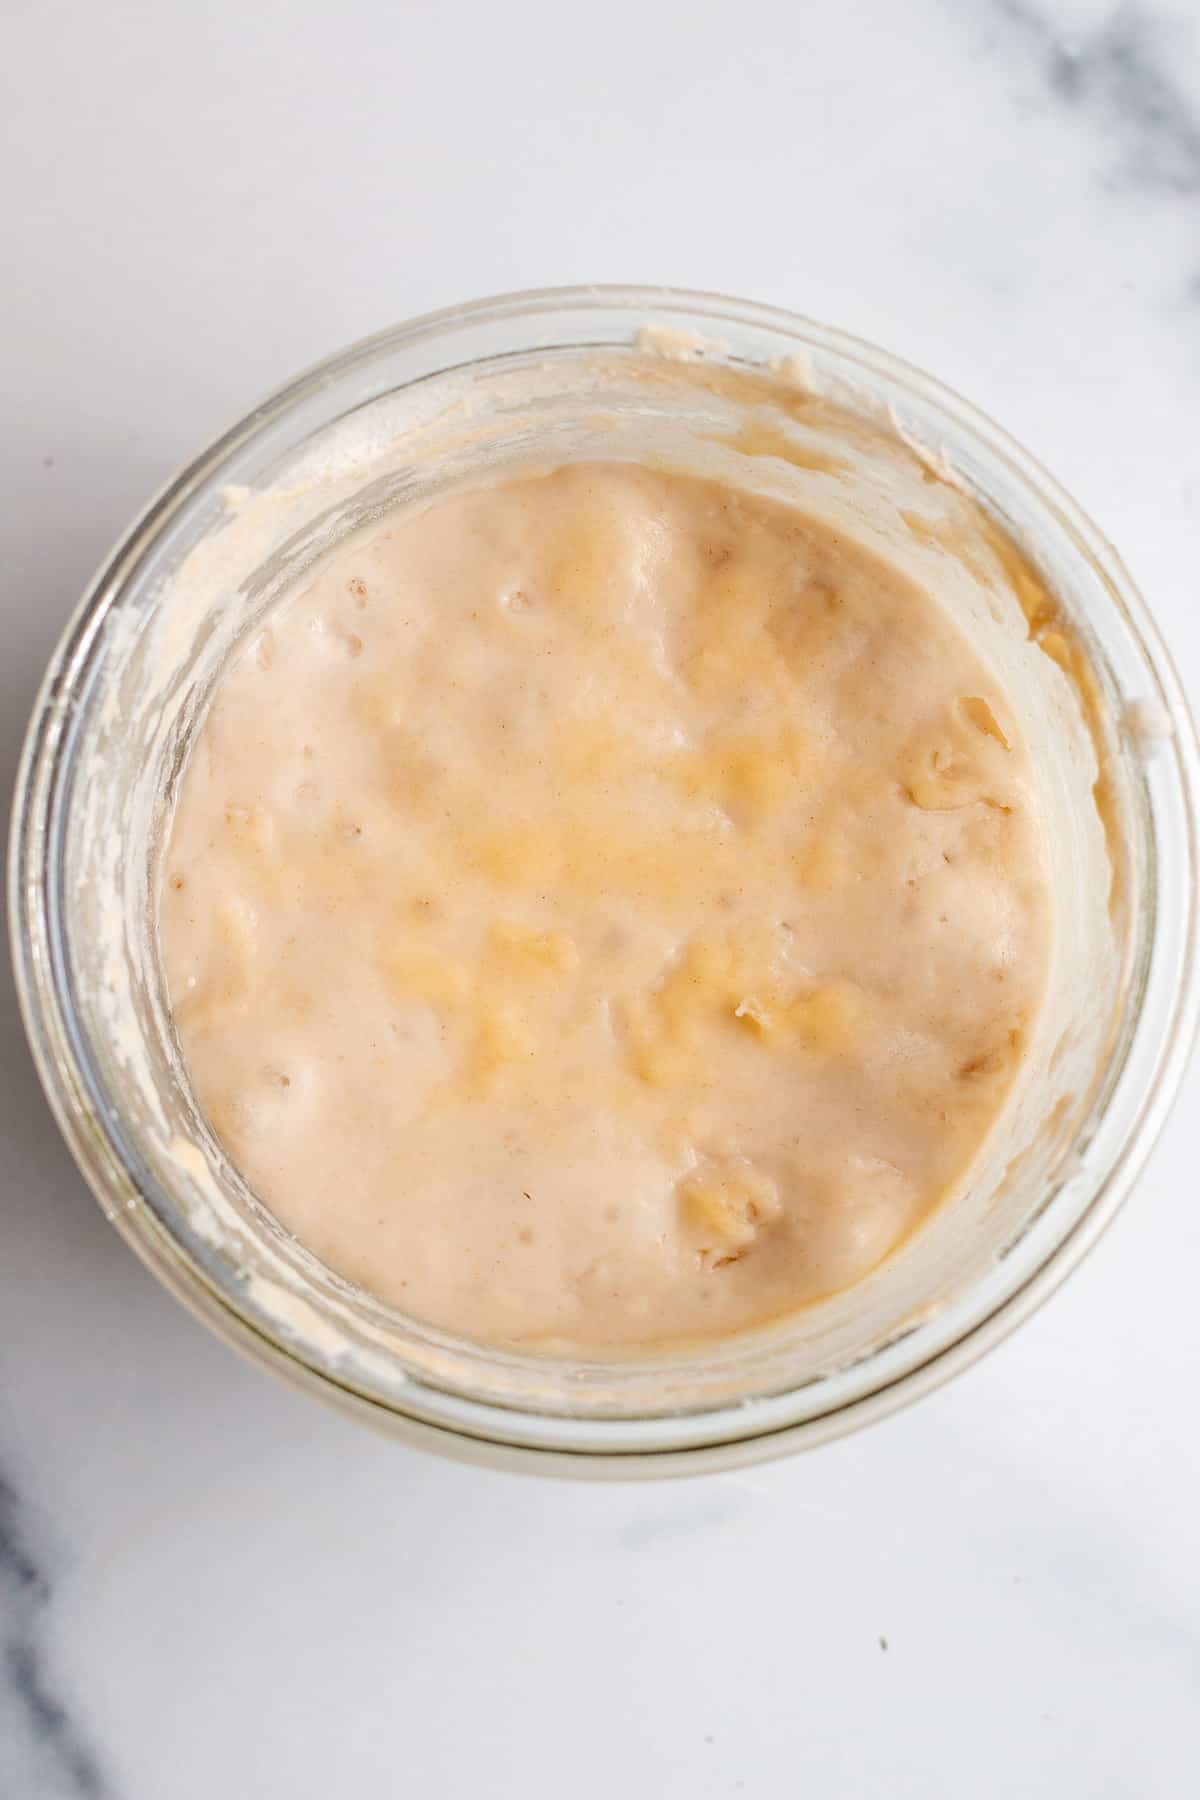
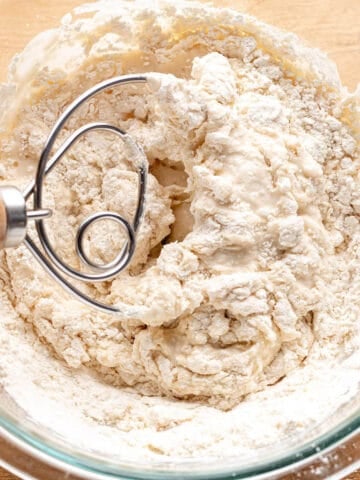
Day 3:
This is what it will start to look like. Much different than day 2. You may even start to notice some bubbles.
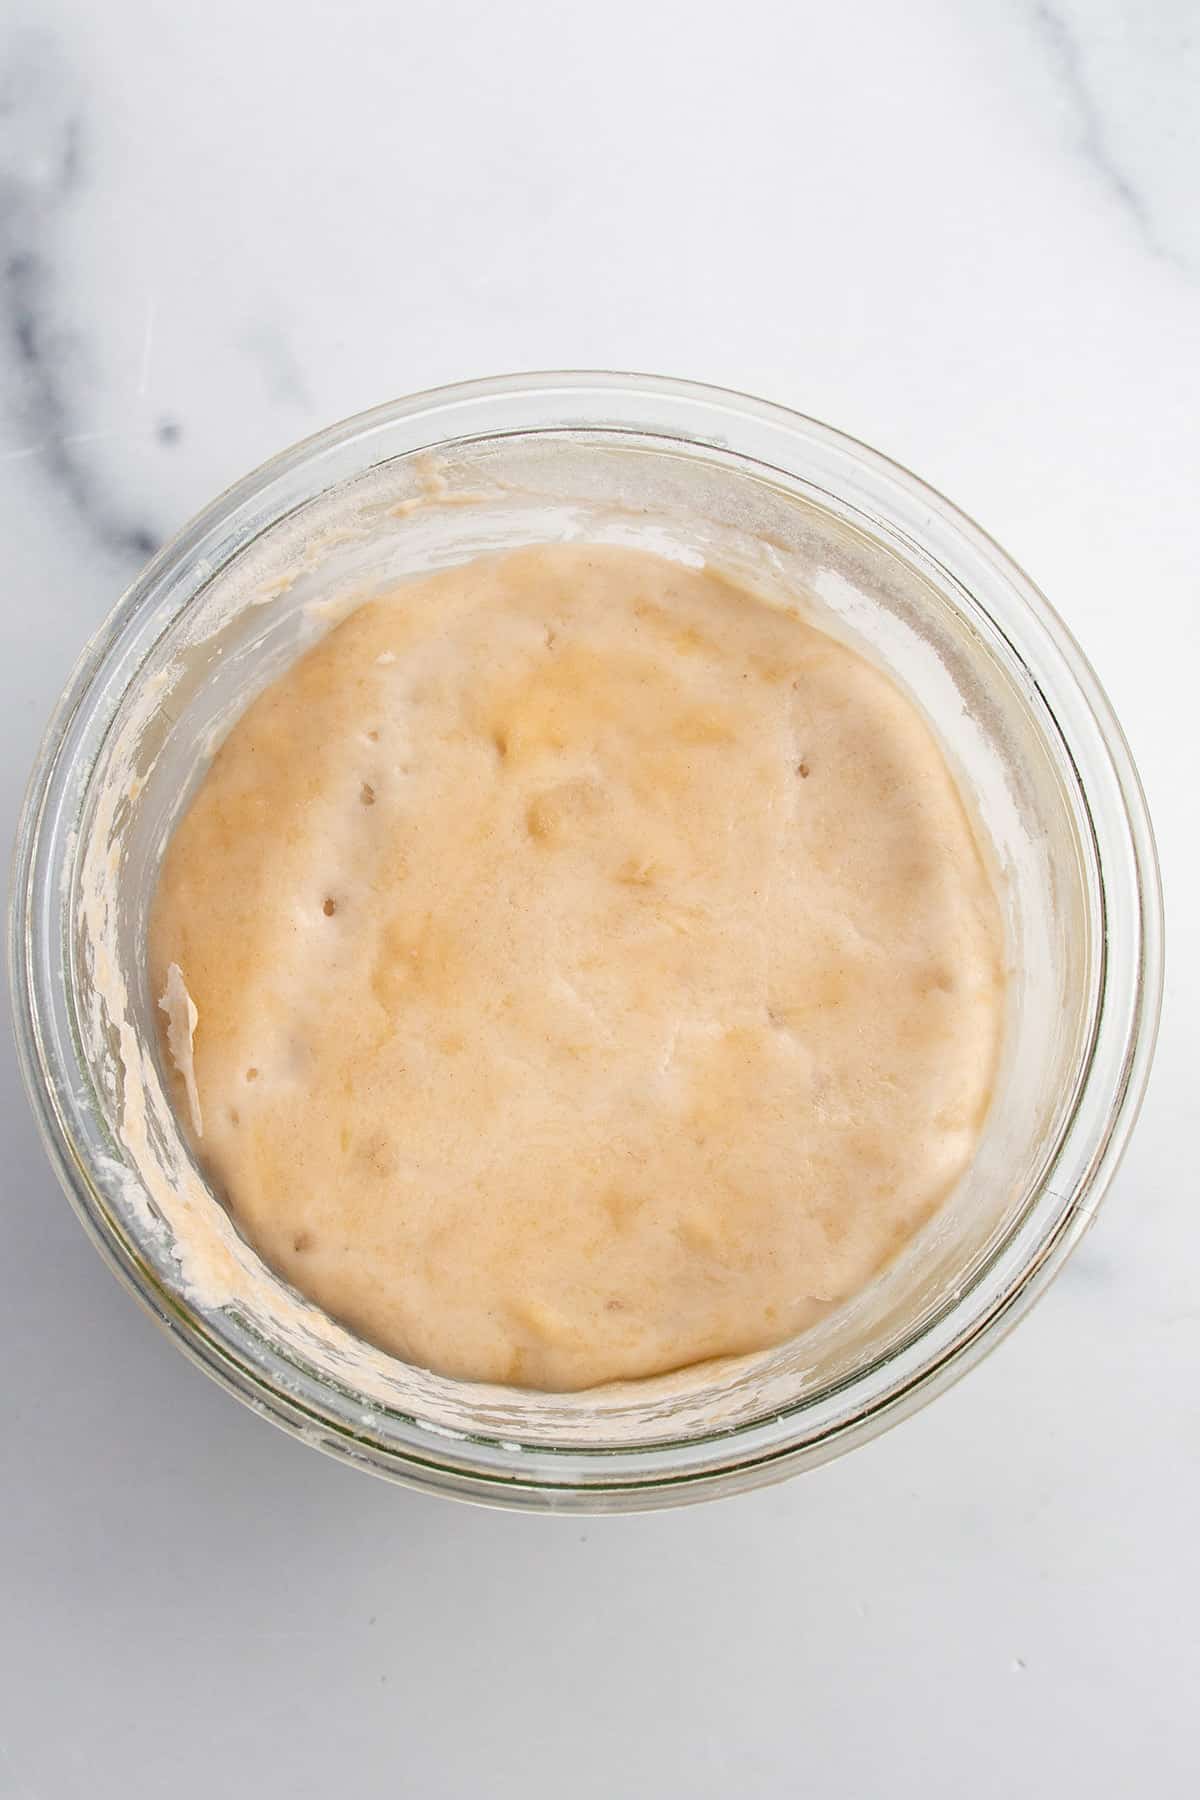
After another 24 hours, repeat the same feeding process from day two.
Remove half (keeping 50 grams), add 50 grams of flour and 50 grams of water. Mix, cover and rest 24 hours.
As we move into day 4, the cultures are starting to come alive, be more active and need more food. It may even start to smell a bit. That is normal.
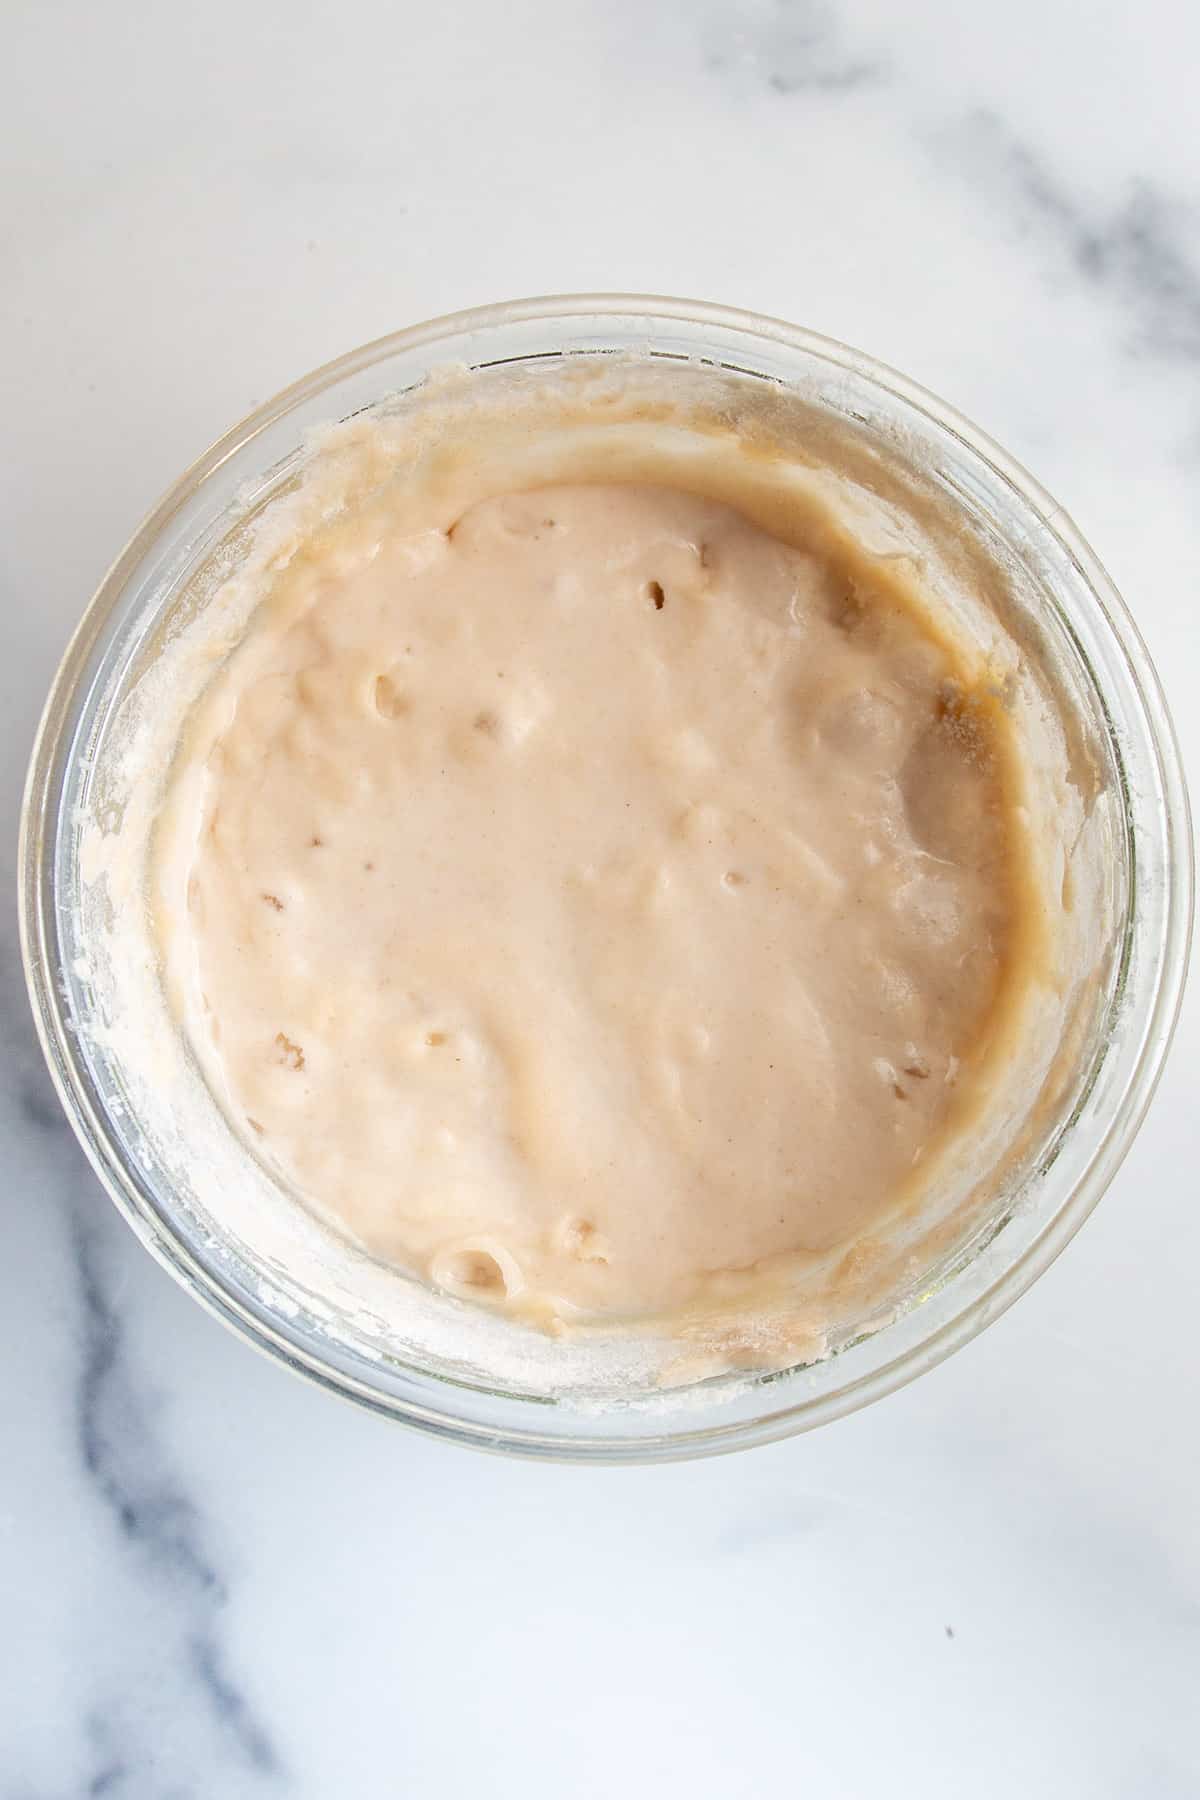
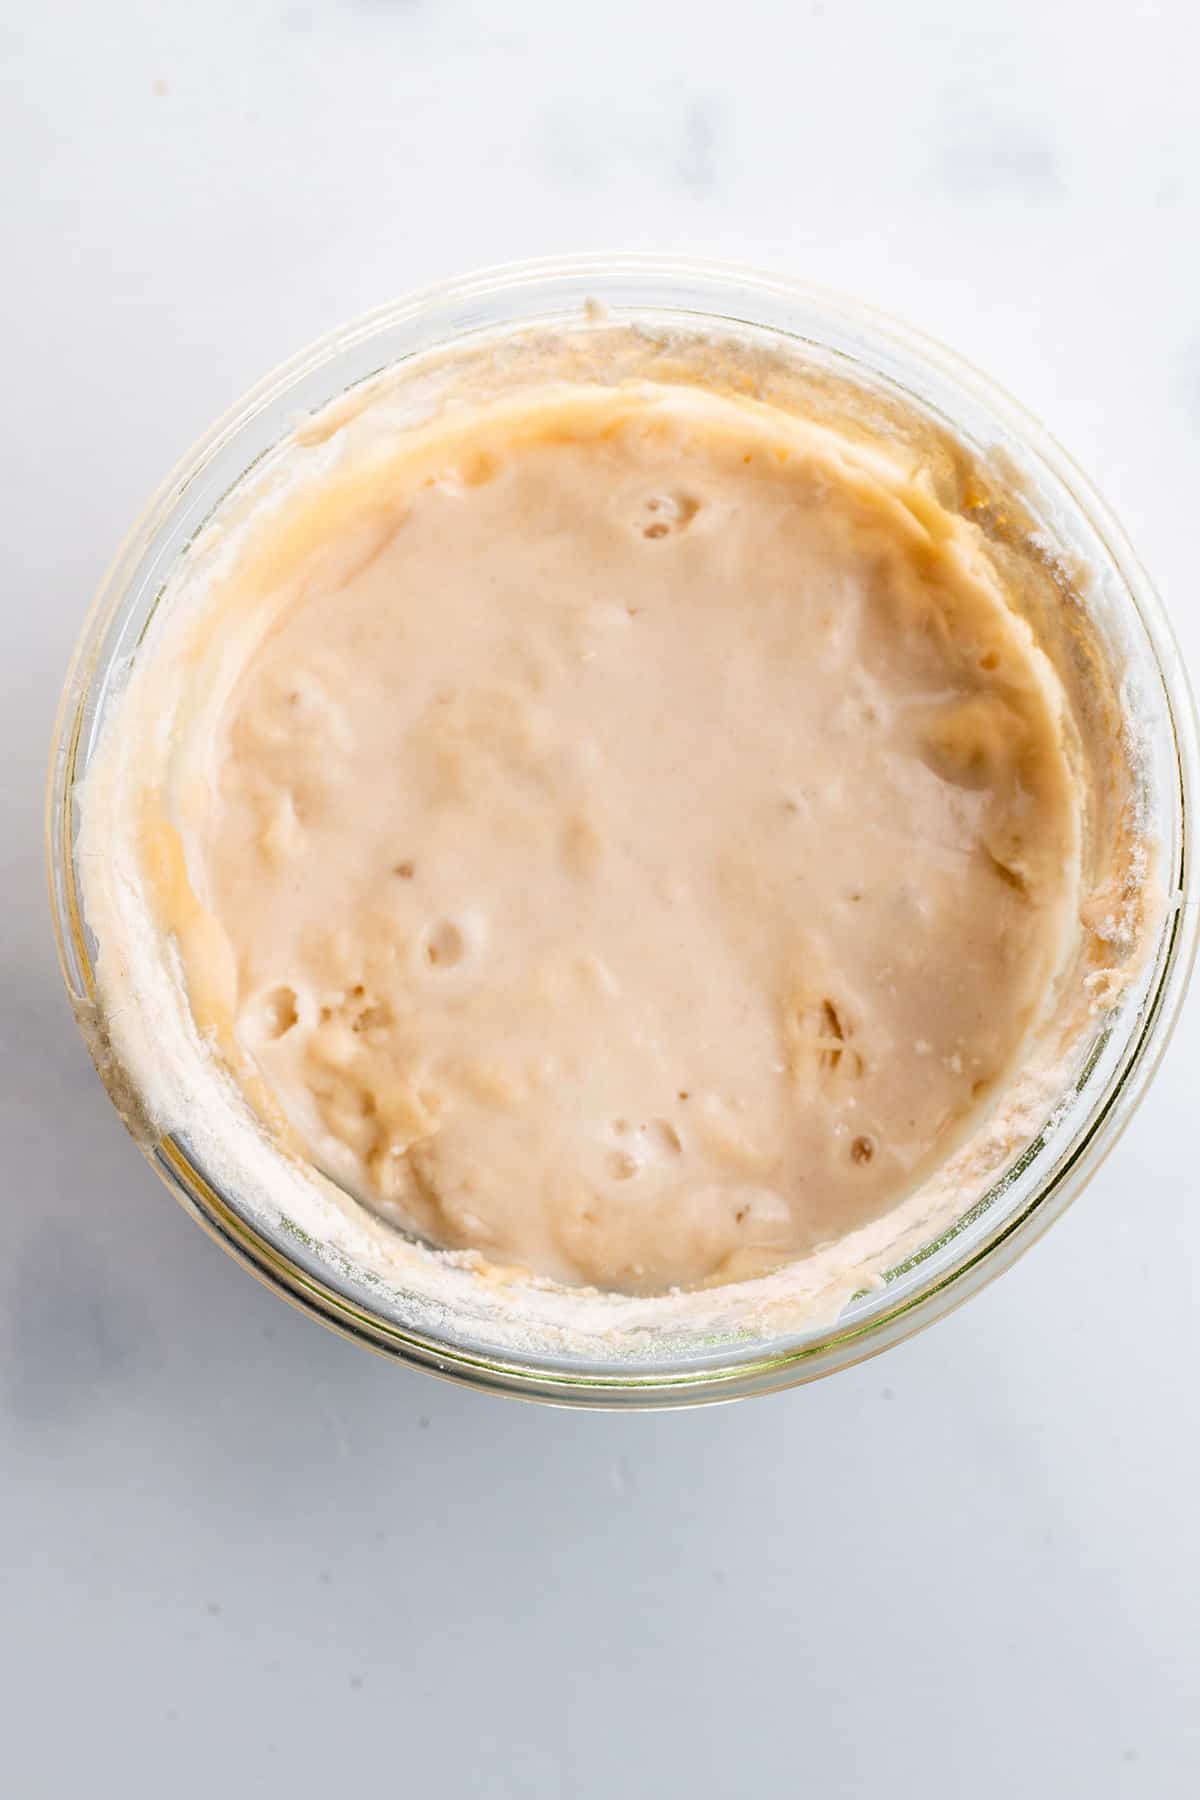
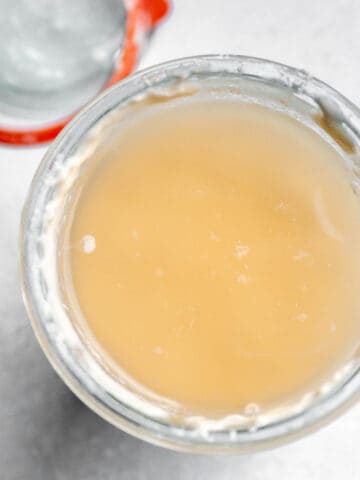
Day 4:
From day 4-7 the starter will need to be increased to 2 feedings a day. One in the morning and one at night.
By day 4 it will start to look a lot more alive. It may even have some bubbles. The photo shows what it looked like in the morning of day 4. It is much lighter in consistency and starting to see some bubbles.
Feeding schedule for day 4:
Morning: Discard, feed, and cover.
Evening: Discard, feed, and cover.
By Evening it could look even more alive.
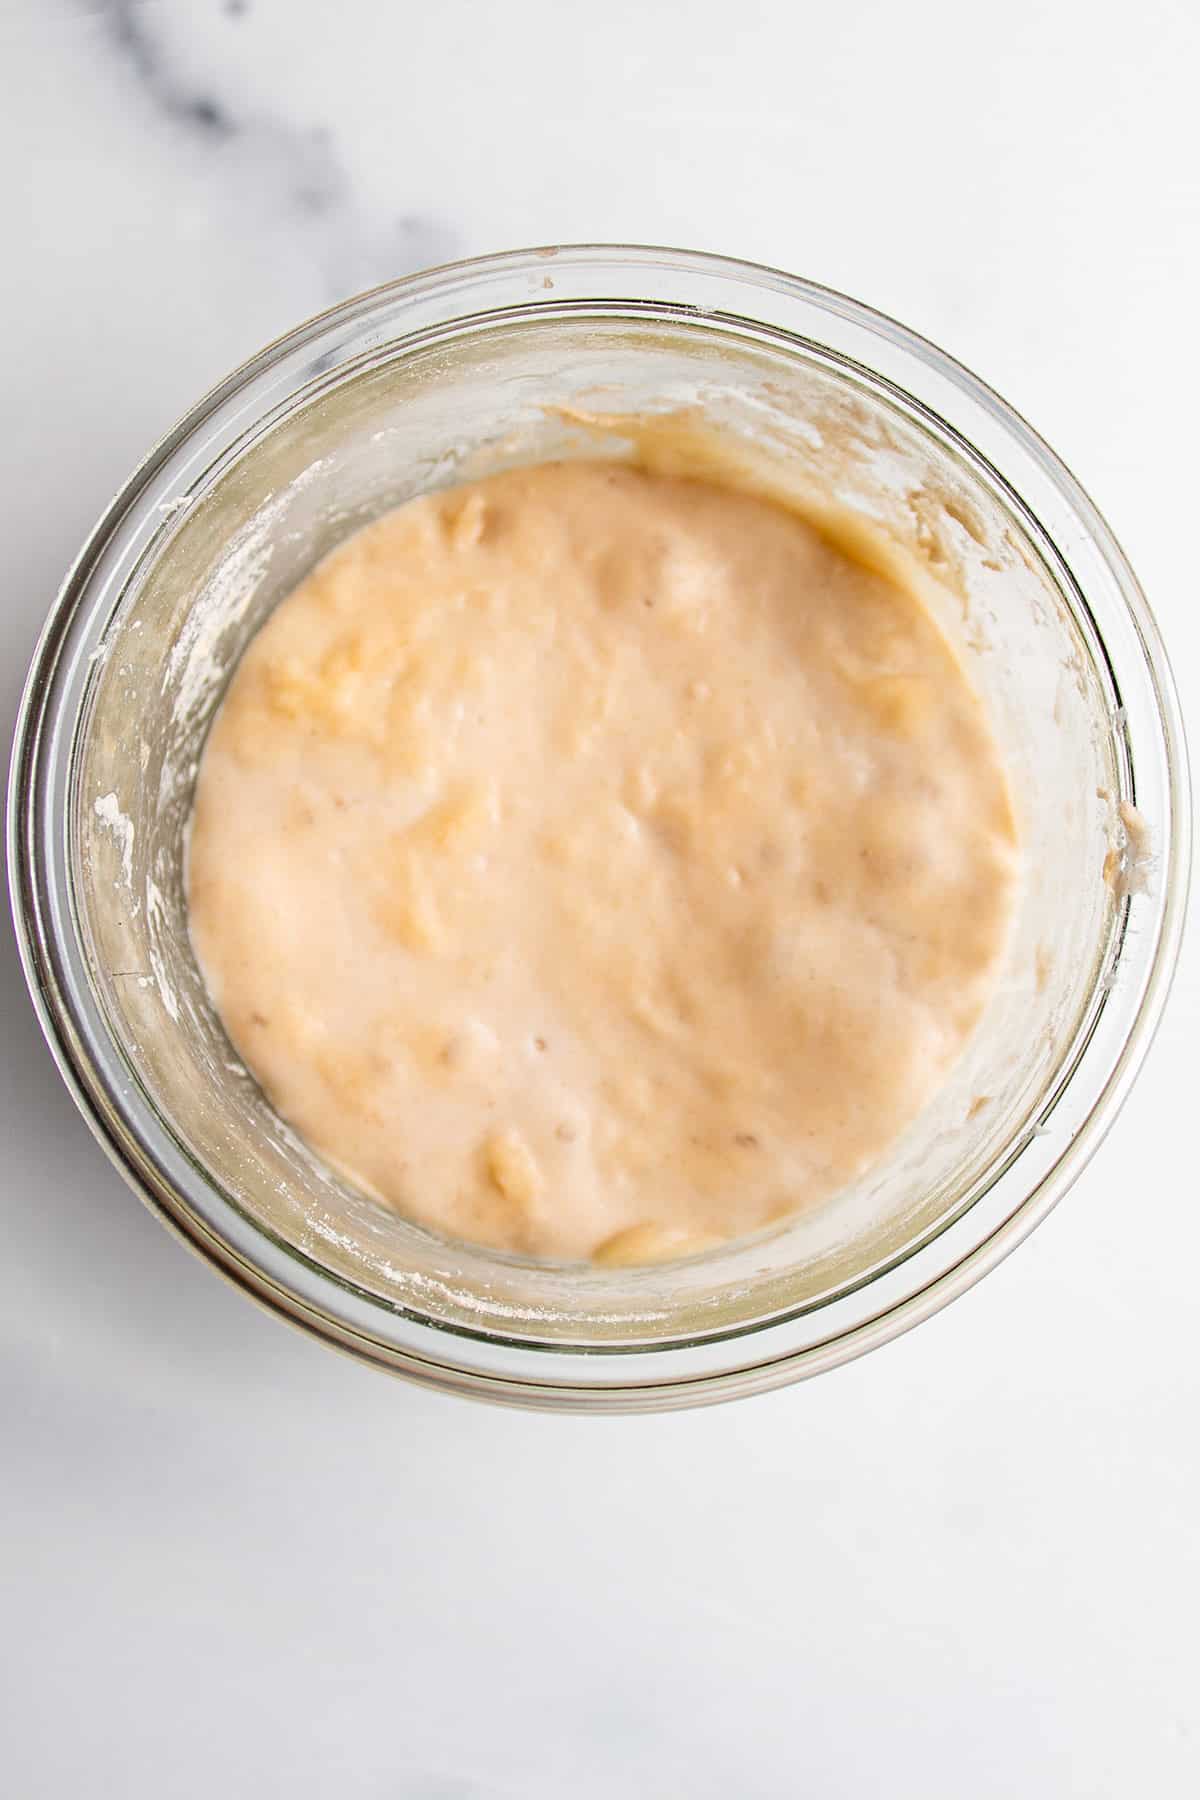
Day 5:
Not much has changed by day 5, but continue with the two a day feedings.
Morning: Discard, feed, and cover.
Evening: Discard, feed, and cover.
Now is a good time to check in. Are you keeping the starter in a warmer location? Is it lightly covered with a tea towel? These things are important when creating a strong starter.
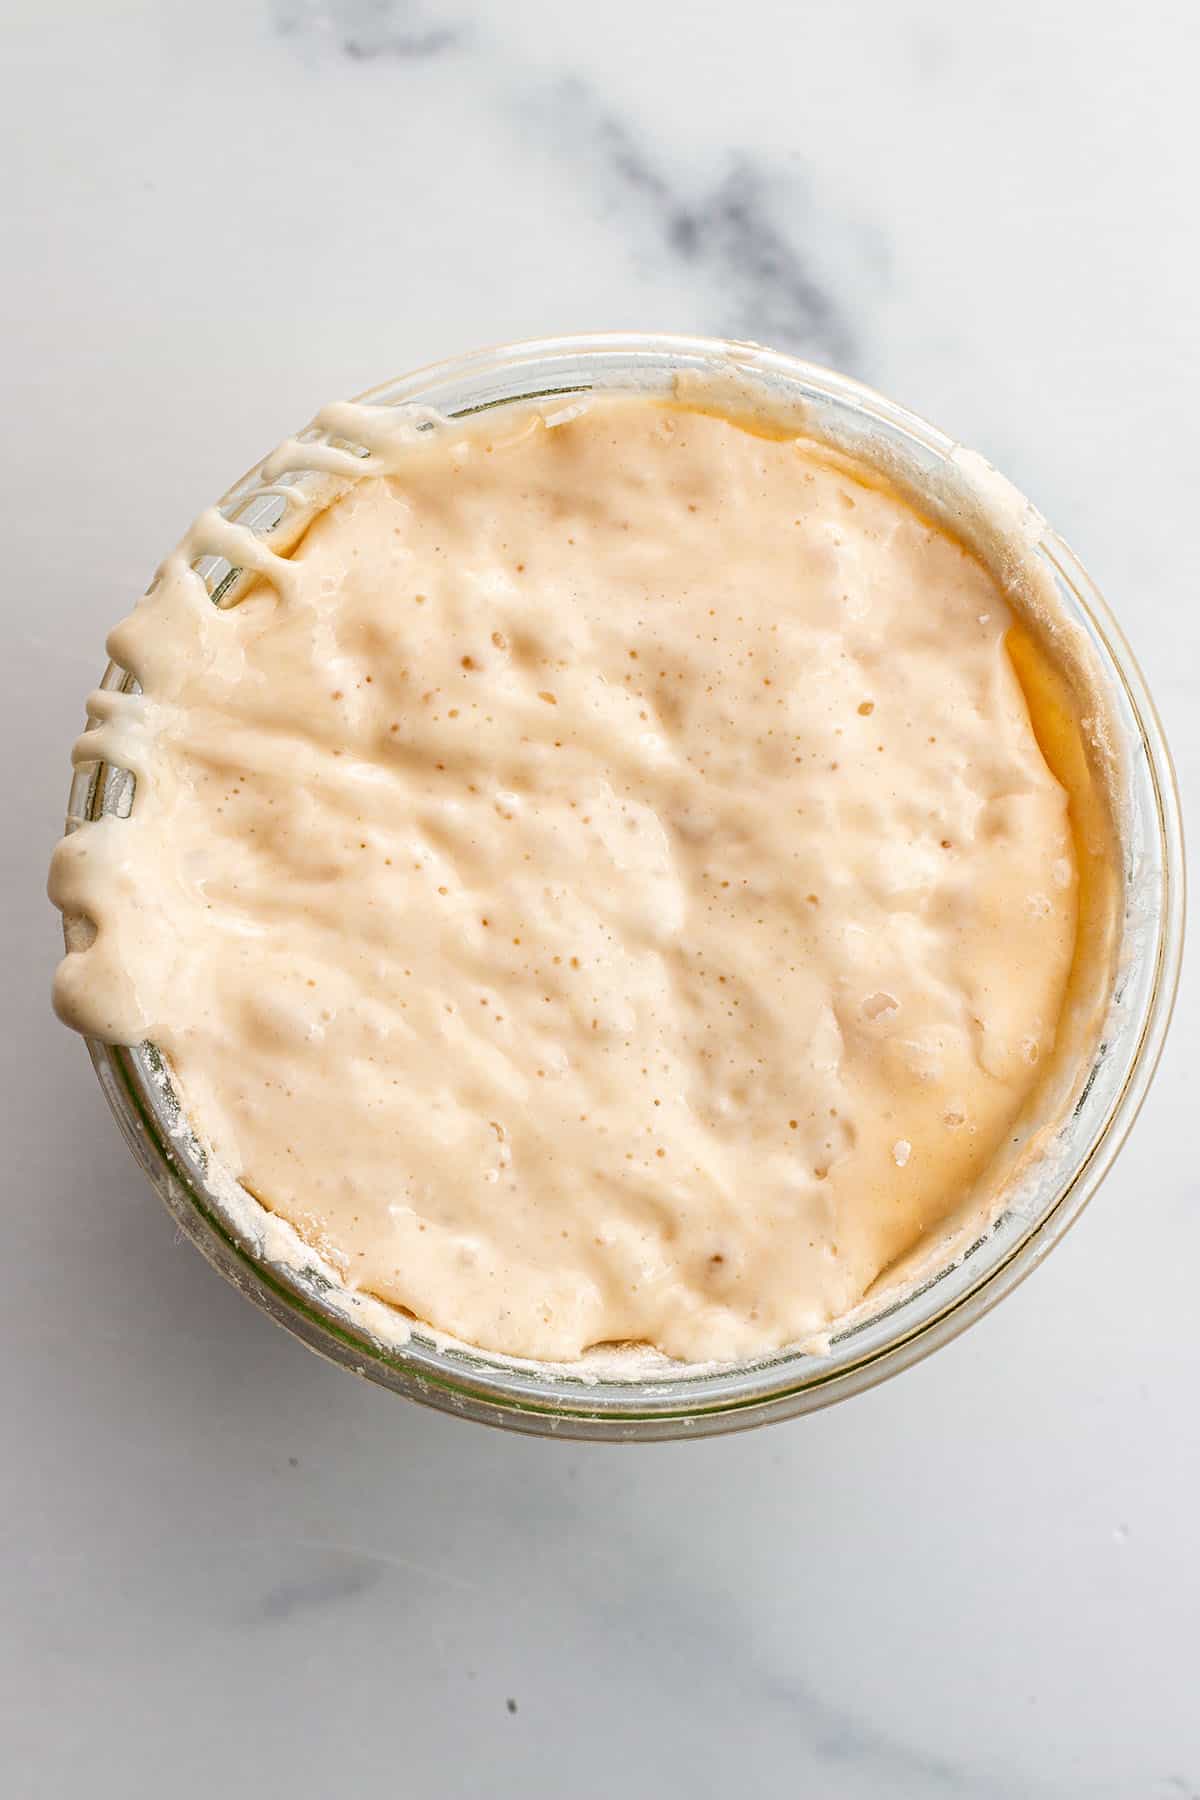
Day 6
By day 6 there seems to be a lot of change. It is getting softer and lighter and developing a crust on top between feedings.
This is normal. The crust just means it needs to be fed. Scrape it off the top and measure out the 50 grams.
Perform two feedings on day 6. Keep 50 grams of starter, feed 50 grams of flour and 50 grams of water.
Morning: Discard, feed, and cover.
Evening: Discard, feed, and cover.
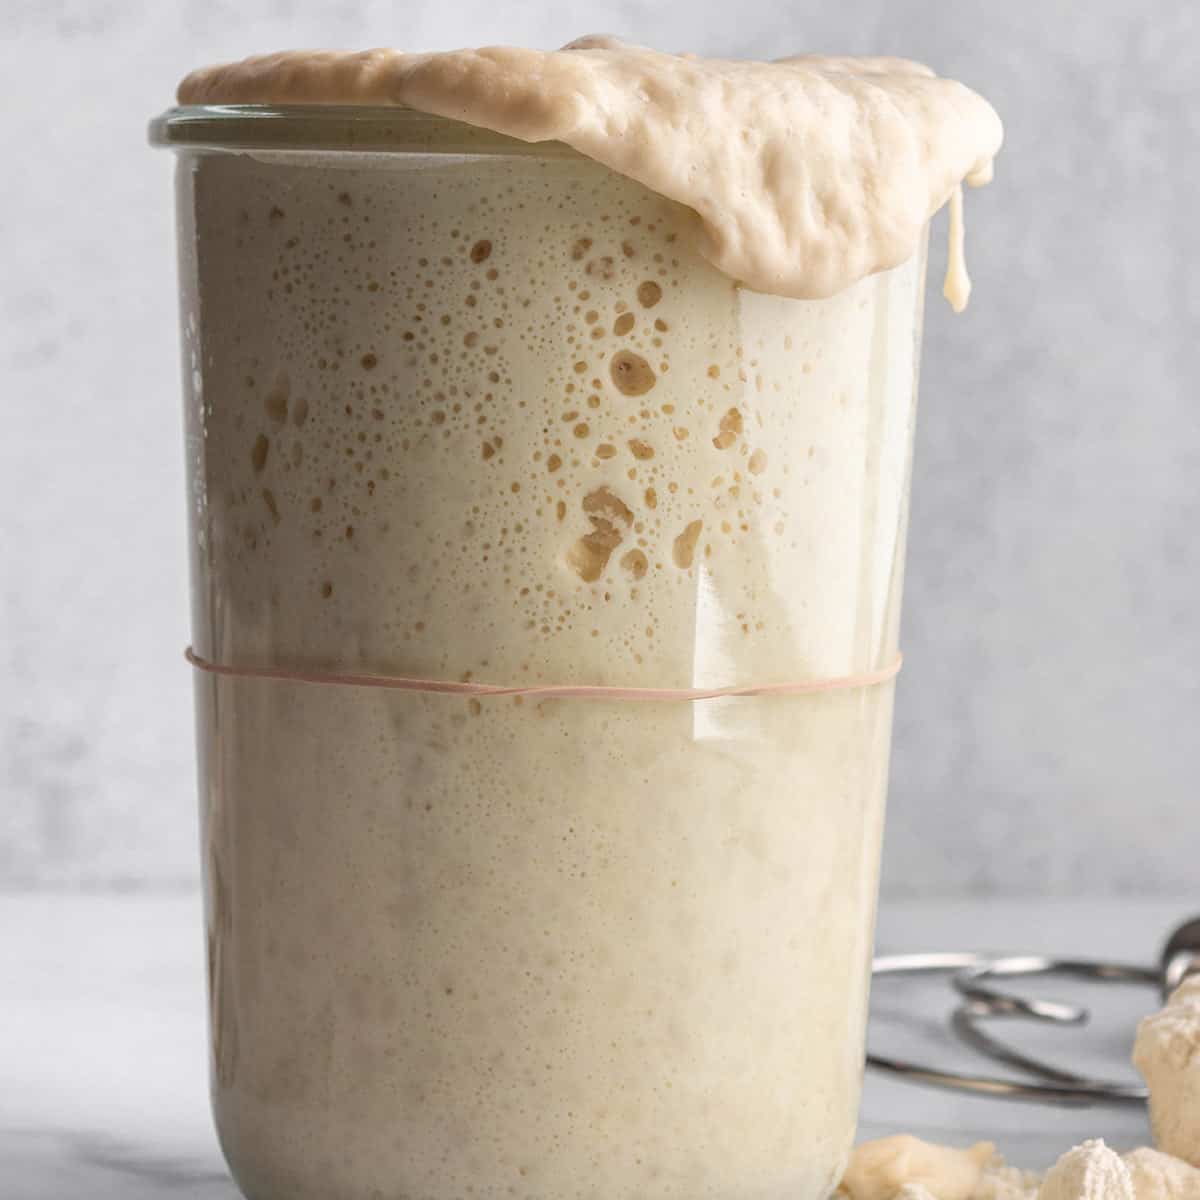
By day 6 begin marking your jar with either a wet erase marker or rubber band. This will make the level of the starter so you can see if there is any growth.
Day 7
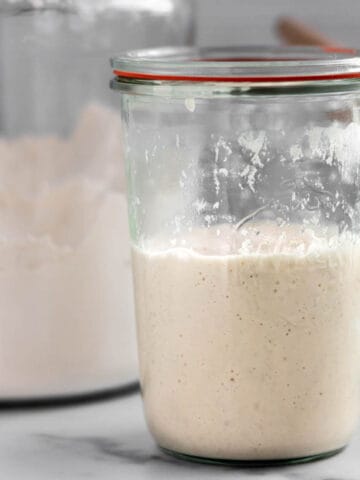
Day 7 it's not only looking different it is acting different.
There may be even more bubbles, its really light and there has even been a little bit of growth. It beginning to look like a perform like a starter.
Keep following the same feeding schedule for day 7.
Perform two feedings on day 6. Keep 50 grams of starter, feed 50 grams of flour and 50 grams of water.
Morning: Discard, feed, and cover.
Evening: Discard, feed, and cover.
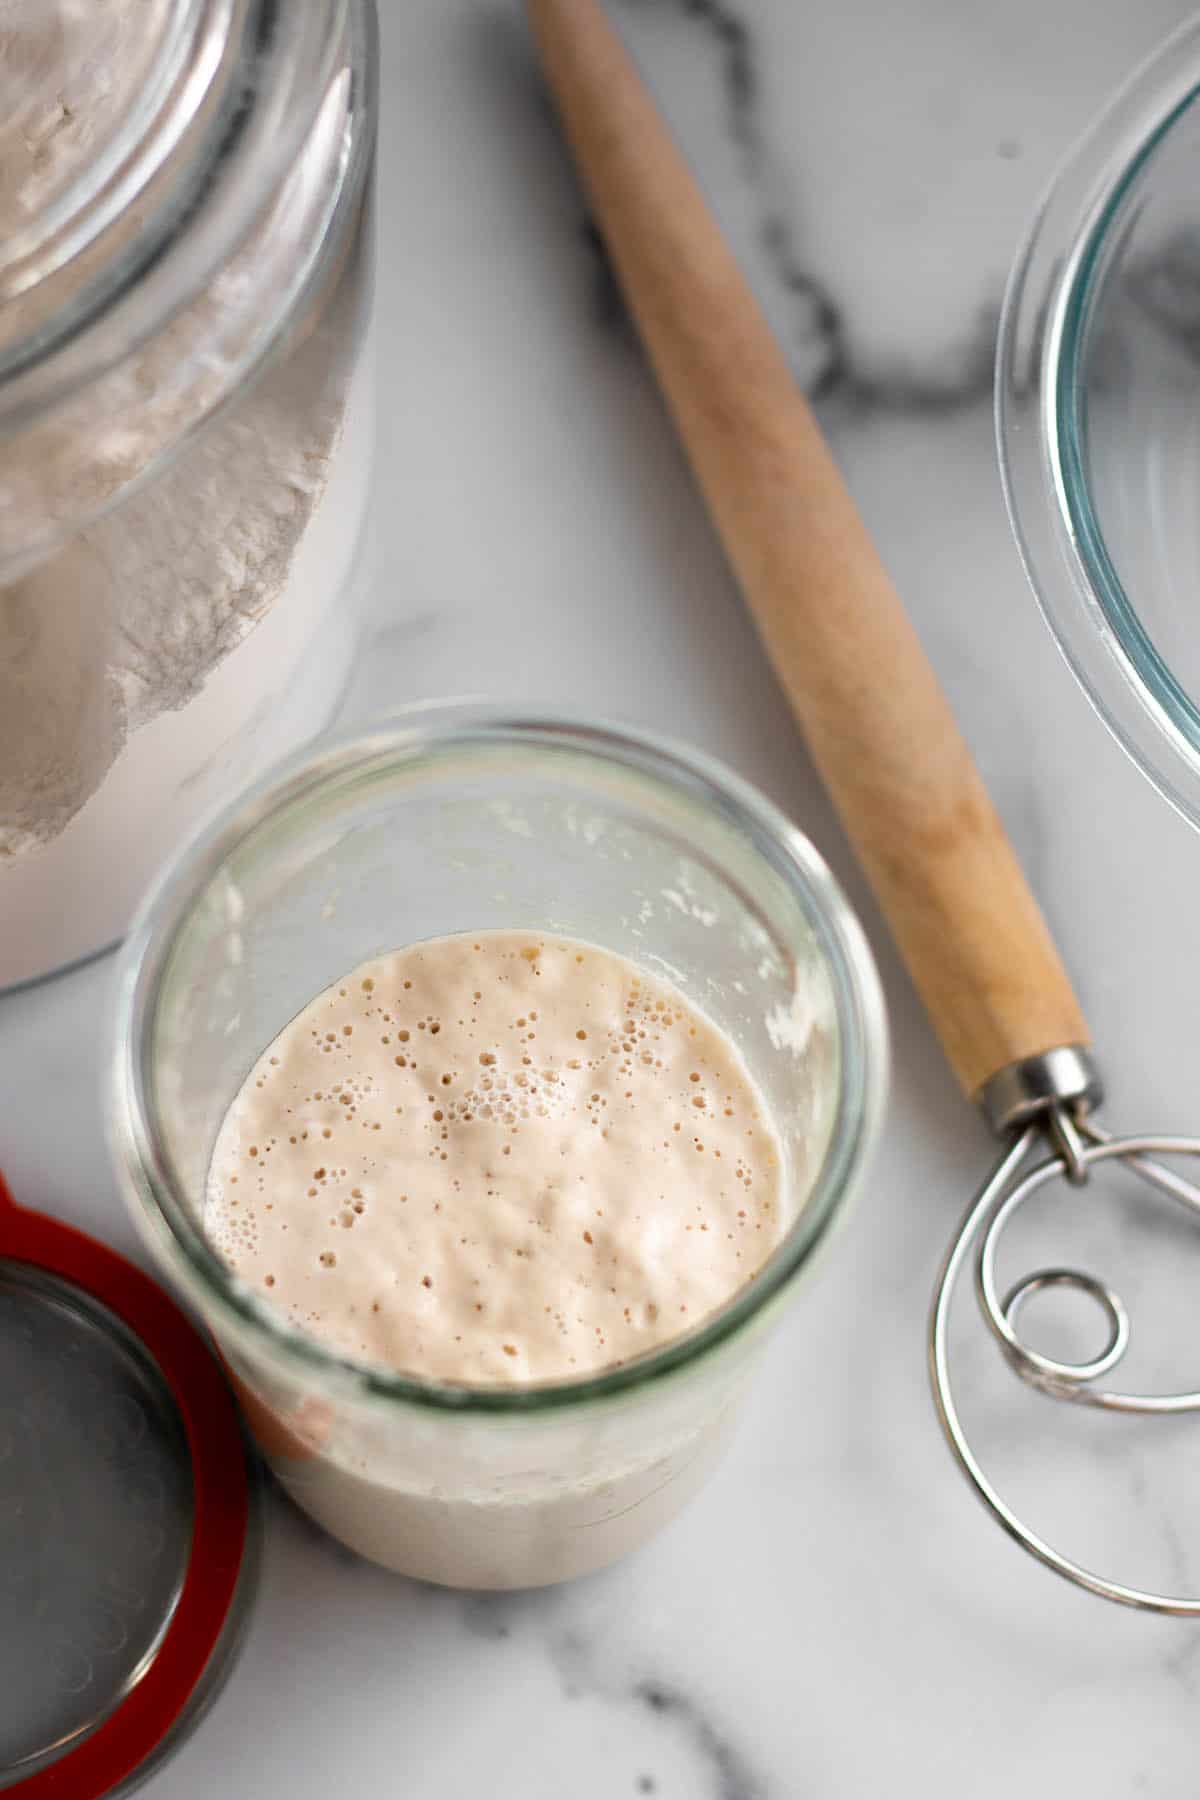
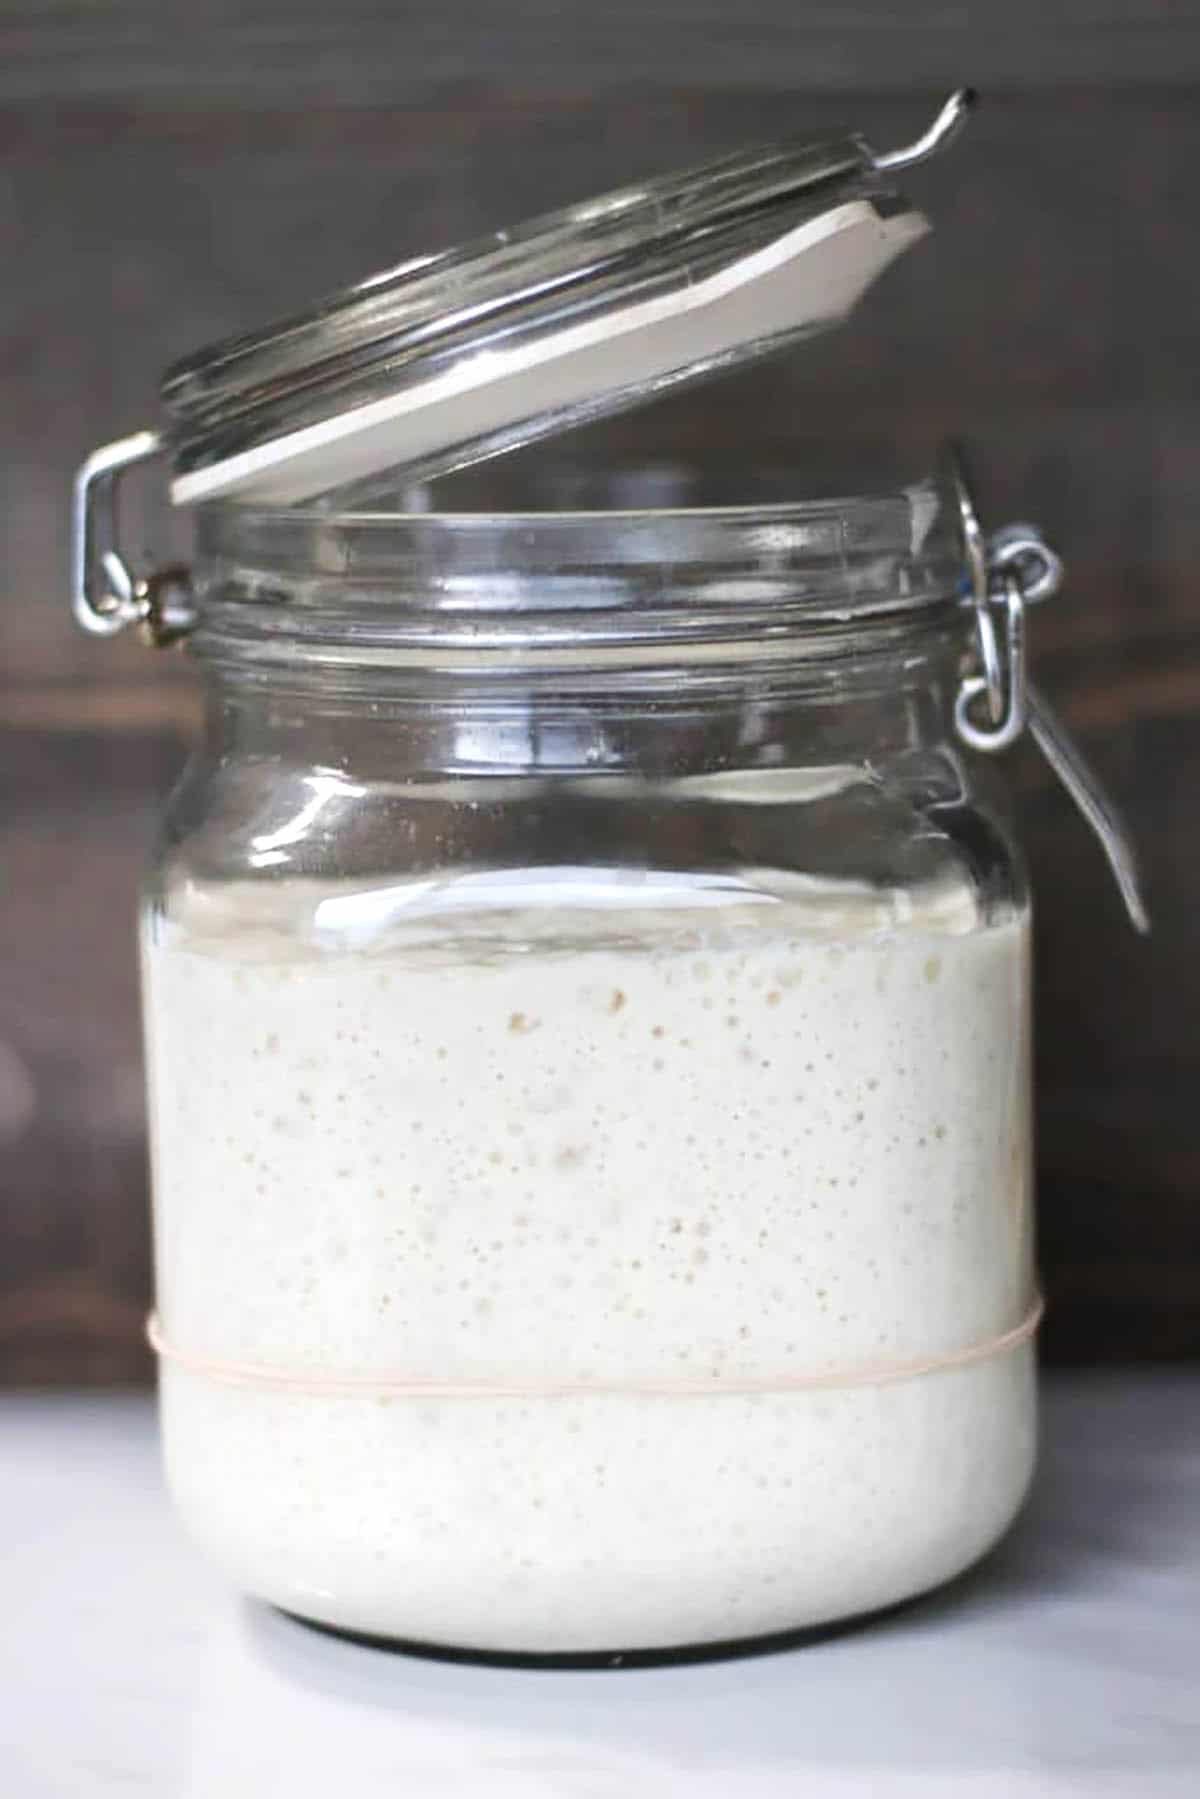
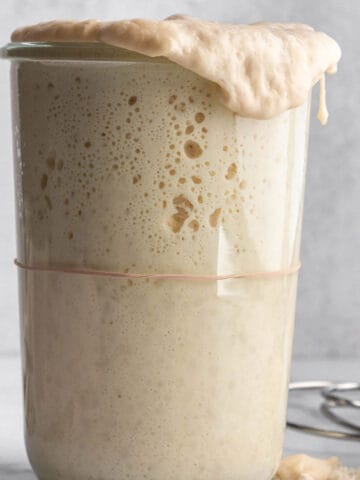
Day 8
By day eight we had it. Removed the towel to the starter growing over the top of the jar, active bubbles and it was so light and airy.
If your starter is growing and looks alive it is ready to make homemade sourdough bread.
Still not sure? Lean more about how to tell a sourdough starter is ready.
Is it Growing?
By day 7-10 you should start to see some growth in your starter. Using a wet erase marker, or rubber band, mark where you starter is before you feed it.
Check back in 6-8 hours and see if it has grown at all. If it has that means it is alive and active and can added to baked goods without the help of another leaven.
Learn more about how to tell when your sourdough starter is active.
You will have a strong starter when it has doubled or tripled in size in that 6-8 hour time.
After 8 hours you may notice that it starts to defeat and go back down.
This is normal. I just means it consumed all the food and energy and lost that baking potential. No worries just re-feed and watch it grow again.
Once it deflates and goes back down, you now have what is called discard. Learn all about sourdough discard and how to use it.
My Sourdough Starter Still Isn't Rising
If you are not seeing any growth after 10 days do not worry! Some starters just take longer to get going. There are somethings you can try before throwing in the towel.
- Move back to once a day feedings.
- Move to a different area of the house. I once tried keeping it in my pantry and it nearly died. It did not survive well in there. Try different areas of your kitchen or even house.
- Find a warmer location. The ideal temp for a sourdough starter is around 75 degrees. If it is too cold, you may not see any growth.
You can always reach out for help! I love helping people get a starter going and want to do the same for you. You can join my Facebook community or simply send me a message.

What to Do Once It's Active
Is your starter doubling in size and looking alive?
This is a great sign its ready to give sourdough bread a shot! Get all my sourdough bread tips, trips and resources.
Or use it in dozens of sourdough discard recipes. The options are endless.
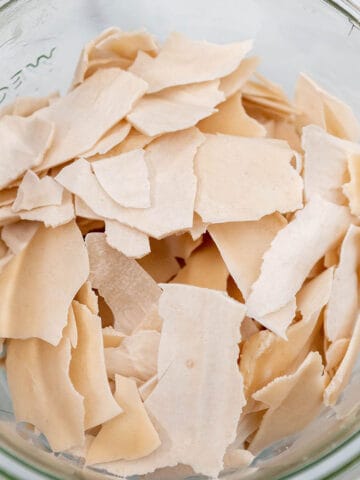
Now that it is active, it's a really good idea to create a backup. Learn how to dehydrate your sourdough starter in the case something happens to it.
Sourdough Starter Frequently Asked Questions
Yes, you absolutely can! It can take anywhere from 7 days to a month to get your own sourdough starter active but it is a very simple process.
Yes any grain flour can be used to make a starter but the best and consistent options are going to be unbleached all-purpose and bread flour.
Flour and water.
When taken care of and fed properly, a sourdough starter can last a lifetime
Sourdough Discard Recipes:
You must use the category name, not a URL, in the category field.Other Sourdough Starter Resources:

📋Recipe
How to Make a Sourdough Starter
Ingredients
- 50 grams Unbleached All-Purpose Flour - Or Bread Flour
- 50 grams Filtered Water
Instructions
Day 1
- On day one take a clean bowl and place on a digital scale. Set to grams and make sure it is zeroed out.
- Add 50 grams of flour and 50 grams of filtered water.
- Mix well, cover with a towel and set aside for 24 hours to rest.
Day 2 and 3
- After 24 hours, remove half of the starter, leaving about 50 grams.
- Add 50 grams of all-purpose flour, or bread flour, and 50 grams of filter water.
- Mix, cover and set aside.
Day 4-10
- On days 4-10 repeat the same feeding process but twice a day. Once in the morning and once at night.
- By day 7, the portion of the starter that is removed can be used in discard recipes.
- By day 7-10 you should start to see some growth.
- If it is doubling in size it may be ready to be added to bread.
- Take a glass of water and drop in a scoop of the starter. If it floats, it is ready.

I’m on day 5 and my starter is looking like runny pancake mix. After I discard and feed it, it is thicker, but by the next feeding it’s runny again. Is this right?
Yes that is really normal. After it feeds on the flour it will look a bit runny. If its too runny just add a tad more flour when feeding.
My starter more than doubled in size before the second day was up. It grew out of my jar and went all over the countertop. Is that normal? I’m afraid what it will look like by 7 days!
Hello, can I ask why the starter needs filtered water? We are on a well with a UV filter. Would my tap water work, or should I buy filtered water from the store? Thanks for answering a potentially silly question!
I say use filtered water from experience. My tap water is not filtered and is really heavy so when I was experimenting I found that filtered water just worked better. If your well water is ran through a filter that should be great. If you are not seeing any growth after a week or so then changing up the water could be something to try.
Thank you Kristen, I have a question. I am on the beginning of day 7. I put the rubber band on my jar yesterday (day 6) and there was very little growth. There were bubbles on top but mine has not had a crust on top. Today day 7 there are some bubbles and tiny little growth. I have used a paper towel on top because I did not have a towel light enough. Am I doing anything wrong? So on day 7 do I leave it uncovered?
No you are not doing anything wrong at all. Sometimes sourdough starters can take a while to get going. Keep it covered at all times so dust and other stuff do not get in and just keep discarding a feeding every 12 hours until you start to see some growth.
what I don't understand is am I supposed to disgard half everyday and if so can I use what I throw to start another batch
Such a great question Colin. For the first week you really want to just toss it. It doesn't have the strength to offer much in terms of baking. You can use it to start another but there really isn't any reason to. Those additional starts will just need to be split and fed and then in a few days you will have so many jars going. Just keep one, cut in half and feed for the first 7 days then after that use the discard in recipes such as pancakes. Please reach out with any other questions!
Hi do you take the 50 grams out of the bowl and put it into another bowl?
You are just going to toss it for the first week.
On day three, prior to feeding, I had bubbles. Discarded half and fed. Day four, it looks just as it did after feeding. No bubbles. Any suggestions?
Just keep discarding and feeding twice a day. It may look different every day. Some days bubbles others non at all but keep with it do not start over!
my third time attempting to start a sourdough starter. I found your recipe and so easy to follow. However, I'm only on day 5, and even yesterday (day 4) it was doubling in size after 8 hours. is this normal?
Hi Matthew! Every starter is different. Some can take just a few days, some 10 others much longer. I say if it is already growing in size you are on the right track! See if it keeps growing over the next few days and then give my overnight sourdough bread a go. https://dirtanddough.com/easy-overnight-sourdough-bread/
Hi Kristin thank you for responding. I tried the float test and most of it just sinks. so im n9tbsure if it is ready yet.
I wouldn't worry about the float test too much. Sometimes it isn't the best indicator if your starter is ready. Once it hits a week old if it is doubling in size about 6-8 hours after feeding you should be good to go. Just keep in mind that it will get stronger as it matures. Please reach out with any other questions!
I think Miss FluffyButt is good to go now. Im gonna try thatv strater bread tomorrow. maybe I missed it but after the starter is good to go what is the feeding regimen. I won't be baking everyday maybe once or twice a week roght now.
I’m on Day 1 of my starter. Do I just leave it out on the counter the whole time? No refrigeration needed? Thank you. This is my first time and just a little unsure.
Yes, correct. Just cover with a light towel and leave on the counter. The only time it needs to be refrigerated is when it goes days/weeks/months without feeding.
Hi Kristin your recipe has been the easiest I’ve found and so helpful finally gave me the courage to start! Now that I’m all started after day 8 what is the maintenance like for the starter? Would it be okay to put it in the fridge and feed once a week or should I do something more? And I’m a little confused about starting a recipe will I do a feed to my starter and use the new starter after it’s fed and then re feed or will I use the “discard” to make the bread?
Hi Jackie! I am so glad you found my info helpful. I do have a post about maintenance and how to care for it. Look through it and let me know if you have any additional questions. As far as baking with it, if you are making bread yes feed it first wait for it to rise and then make your loaf. For discard recipes you can use starter that is unfed. Each recipe should specify which to use.
Hi, my 3rd day starter is very bubbly already and risen well. hence the hot westher in SA. Do I need to just follow the step by steps or must I feed it twice a day. I'm just concerned it's rising too quickly..oh and it has this stinky smell...lol. please help me.
Hi Linda, yes it should have a slight smell to it. As long as it not rancid it will be okay. If it is doubling in size after 6-8 hours then you have a very active starter and could attempt to make bread.
Hi Kristan, thank you for your reply. Now it is day 9. I checked my starter, it has doubled in size very frothy on top and bubbles throughout, but a little thin. I have now fed it this morning. I added a little more flour in order for it to have a thicker consistency. I hope this is correct. When my starter doubles in size again will it be ready for baking, or do I keep feeding for a few more days?
Yes if it doubles again I would say it is time to make bread!
Hi thank you for the very detailed post. I am very excited to start my sourdough starter! Would it be ok for me to use whole wheat flour the entire time? Or do I need to switch to AP flour?
Welcome to the sourdough journey!! Please reach out with any questions. Yes you can use whole wheat. It may not perform exactly like a starter with all purpose but you can be successful with it.
Thanks for such detailed instructions Kristin! I started my starter today!! 🤞🤞
You got this!! Happy to answer any questions. Excited for your sourdough journey.
Have you tried almond, buckwheat, oat, rice or any gluten free flours?
I have not. I just stick to all purpose or bread flour. I know some people have success with gluten free flour but I'm not sure about the others.
Thank you for posting - though I think there may be a typo in the "recipe" part of the post. Day 2 and 3 should be edited to "add 50 grams of flour" instead of 100, right?
Yes your are correct it should be 50. I use to suggest 100 but you can really get it going with only 50 grams which helps minimize waste in the beginning.
Hi I’m on day 3 and not seeing any bubbling or anything. Should I just repeat day 2 instructions?
I would continue to feed every 12 hours for a few days. Make sure to store it in a warm location and cover with a light tea towel. I would not change anything until after about 10 days of discarding/feeding twice a day.
Hi Kristin,
Thank you so much for all the tips for this recipe. I followed it except that my starter did not grow much or double in size after 8 days and going on 9th day today. I kept the jar clean, fed twice daily now back to once daily, and temp has been 74F. Thinking of changing location. Besides, what should i do? Appreciate your help.
Syndi
Hi Syndi! That is normal some starters will just take longer. What flour are you using? What are you using to cover it? And yes I would try moving it to a different location. I would try moving it to once a day feedings again for a couple of days and see if that helps. Please reach out with any other questions.
Sourdough starters are the best pets that feed your family endlessly! #sourdough for life!
That is so true! We love our starter.
I need to get my starter out of the fridge. I really love sourdough, thank you so much for all the information!
We do to! It's really the best.
When starting out, do you use a clean glass bowl/jar each day/time you feed to ensure you have 1:1:1 ??
Also is Bobs Redmill unbleached all purpose flour a good start?
Thanks!!
That's what I have done but you can also use the same jar if that is easier. Bobs redmill is great!
Hi Kristin, My names Linda,
I have questions about my starter please. I am on day 3. I starter 60g each, second day I just fed my starter the same amount. 24 hours later. Today the 3rd day. I discarded 60g then added the equal amounts of flour/water. My starter is very bubbly and does have a slight glue smell. it's risen well, hence the hot weather.
I find it very airy snd bubbly I'd this correct? please help me.
Yes this sounds like it is doing exactly what it should be doing at this phase! I would switch now to feeding every 12 hours until it starts to double in size. You can also email photos to me at kristin@dirtanddough.com if you want me to take a look at it. Thank you for reaching out!
You are a bread queen. I so appreciate all your tips. You're so knowledgable!!
Thank you so much for your kind words! I just love bread.